Can You Stain Wet Wood: What Happens And Solutions
You shouldn’t stain wet wood because moisture prevents proper stain adhesion, causing peeling, flaking, and blotchy finishes. Wet wood traps moisture under the stain, which increases the risks of rot and mold.
To avoid this, test moisture with a water bead test or a moisture meter, and wait until the wood reaches 12% to 18% moisture content. You can use heat, airflow, or dehumidifiers to dry the wood faster.
Explore practical steps and solutions to achieve a smooth, durable finish on your wood projects. Taking the time to properly prepare your wood will really pay off in the long run.
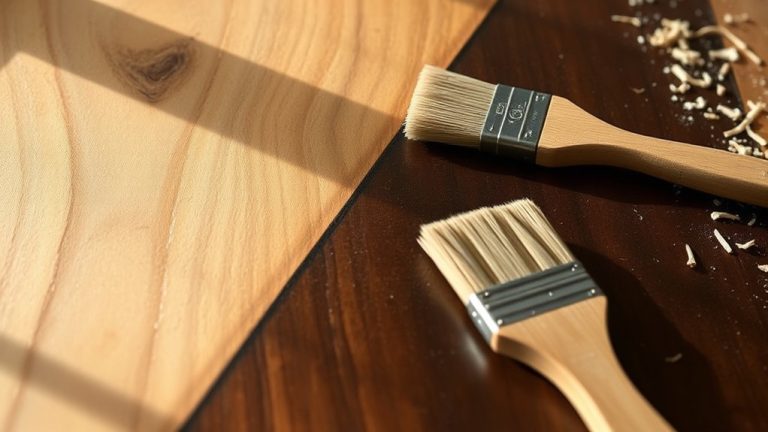
Why Staining Wet Wood Doesn’t Work Well
Although it might seem convenient to stain wood right after cutting or cleaning, staining wet wood often leads to poor adhesion. This causes the finish to peel or flake over time.
When moisture content is too high, the stain can’t bond properly. This results in an uneven, blotchy surface. Plus, wet wood traps moisture beneath the stain, which increases the risk of wood rot and mold growth.
Oil-based stains especially struggle to penetrate damp surfaces. This leads to holdout problems and a compromised finish.
To avoid these issues, manufacturers recommend waiting until the wood’s moisture content falls within an acceptable range, typically 12-18%, before staining.
Following this guideline guarantees the stain adheres well and protects the wood effectively. It’s a simple step that makes a big difference in the durability and appearance of your wood finish.
Signs Your Wood Is Too Damp to Stain
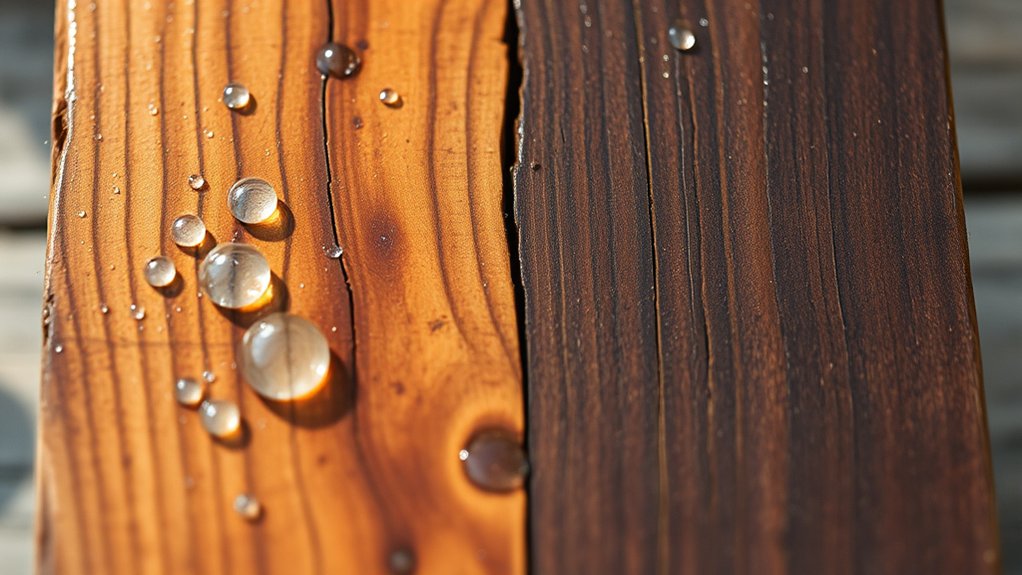
You can tell your wood is too damp to stain by looking for water beads on the surface. If those beads don’t soak in quickly, it means the wood isn’t ready yet.
Also, pay attention if the edges feel wetter than the surface or if the wood feels cool when you touch it—these are signs there’s still moisture inside.
Keeping an eye on these visual and tactile clues helps make sure you only stain dry wood, which is key for a smooth, even finish.
Moisture Content Indicators
How can you tell if your wood is too damp to stain? One effective method is the water bead test: sprinkle water on the wood surface. If the water beads up instead of soaking in, the moisture content is too high, and the wood is too damp to stain. This means the stain won’t penetrate properly, leading to poor adhesion.
Pressure treated wood often has moisture content between 20% and 30%, requiring weeks or months to dry before staining.
Even if plywood looks dry on the surface, its edges may retain moisture, making it unsuitable for staining.
Ideally, wood should have a moisture content between 12% and 18% for the best stain results.
Use a moisture meter or water bead test to confirm readiness before staining. It’s worth taking the time to check because staining damp wood can cause problems later on.
Visual And Tactile Cues
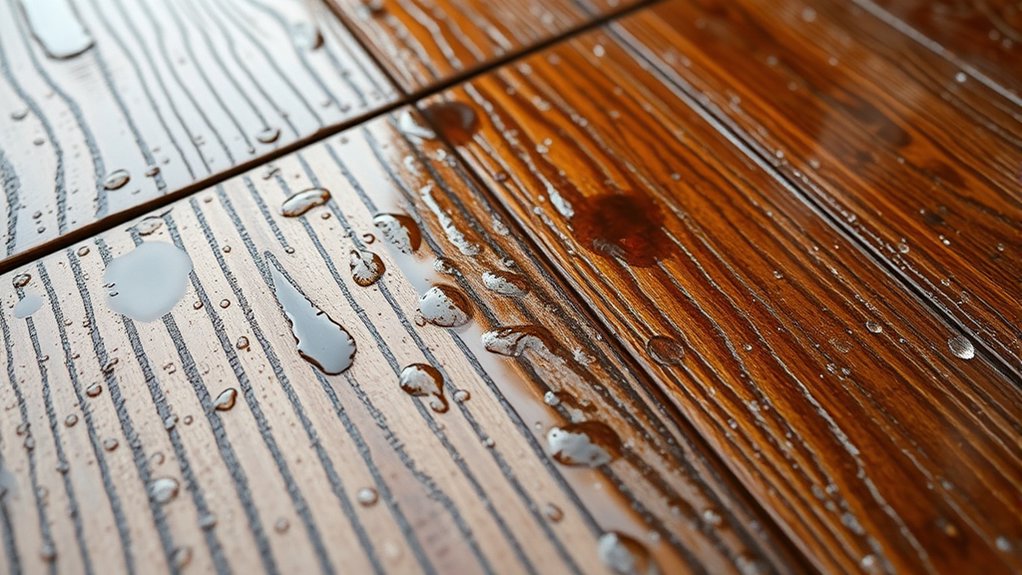
When water beads on the surface of wood, it signals excessive moisture that will block stain absorption and adhesion. As visual cues, look for darker edges on plywood or boards, which often indicate higher moisture levels.
Tactile cues are just as important. If the wood feels cool or clammy to the touch, it’s likely too damp for effective staining.
You can also test absorption by placing a water drop on the wood. Rapid soaking means the moisture is low enough, while prolonged beading confirms excess moisture.
Keep in mind, humid conditions raise overall moisture content, so always assess your environment before staining.
Recognizing these visual and tactile cues helps guarantee your stain adheres properly and achieves a smooth finish. It’s a simple step that makes a big difference in the final look of your project.
How Moisture Affects Paint and Stain Adhesion

You’ll find that moisture really weakens the bond between paint or stain and wood. Over time, this can cause peeling or flaking.
Plus, when water gets trapped, it can lead to wood rot and mold, which damages the surface underneath your finish.
Moisture Impact On Bond
Although it might be tempting to apply stain or paint right away, moisture in wood can seriously weaken the bond between the coating and the surface. When wood is damp, moisture disrupts adhesion, causing coatings to peel or flake prematurely.
This compromised bond not only leads to uneven finishes but also traps moisture beneath the surface, increasing the risk of wood rot. Over time, this degrades both the wood and the protective layer, shortening the lifespan of your project.
Manufacturer guidelines stress the importance of verifying wood moisture levels and recommend waiting for dry conditions before applying any coatings.
Following these instructions guarantees a strong, lasting bond and prevents common issues caused by moisture interfering with adhesion.
Risks Of Trapped Water
Because moisture can become trapped beneath paint or stain, applying these coatings to damp wood often causes adhesion problems that lead to peeling and flaking.
This poor adhesion happens because the moisture keeps the finish from bonding properly with the wood surface.
Trapped moisture also creates the perfect conditions for wood rot, which speeds up decay and weakens the structure beneath the coating.
Plus, moisture encourages mold growth under the paint or stain. Mold not only damages the wood more but can also affect indoor air quality.
All these problems together shorten the life of your finish and cause it to fail sooner than expected.
So, avoiding moisture getting trapped is key to making sure your coating stays durable and looks great.
That way, it protects the wood effectively over time.
Surface Preparation Importance
Three key steps define effective surface preparation when staining or painting wood, with moisture control at the top.
Moisture content directly impacts paint adhesion. If the wood is damp, stains and paints won’t bond properly, often causing peeling or flaking.
To avoid this, use the water bead test. If water beads rather than absorbing, the wood is too wet for treatment. Applying finishes on wet surfaces traps moisture, which promotes wood rot and encourages mold growth. This compromises the wood’s integrity.
Proper surface preparation involves thoroughly cleaning the wood and making sure it’s dry before you start applying anything. This approach guarantees an even finish and durable adhesion. It also prevents issues linked to high moisture levels.
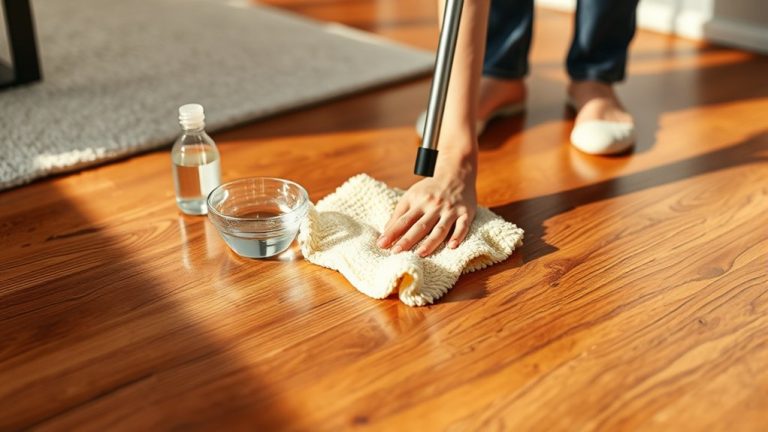
How to Dry Wood Quickly Before Staining
When you need to stain wood quickly, speeding up the drying process is essential to guarantee proper finish adhesion and prevent damage.
Start with thorough surface preparation by cleaning the wood to remove contaminants that hold moisture.
Use heat application carefully. You can employ a heat gun or space heater to raise the temperature around the wood, promoting faster evaporation without causing warping.
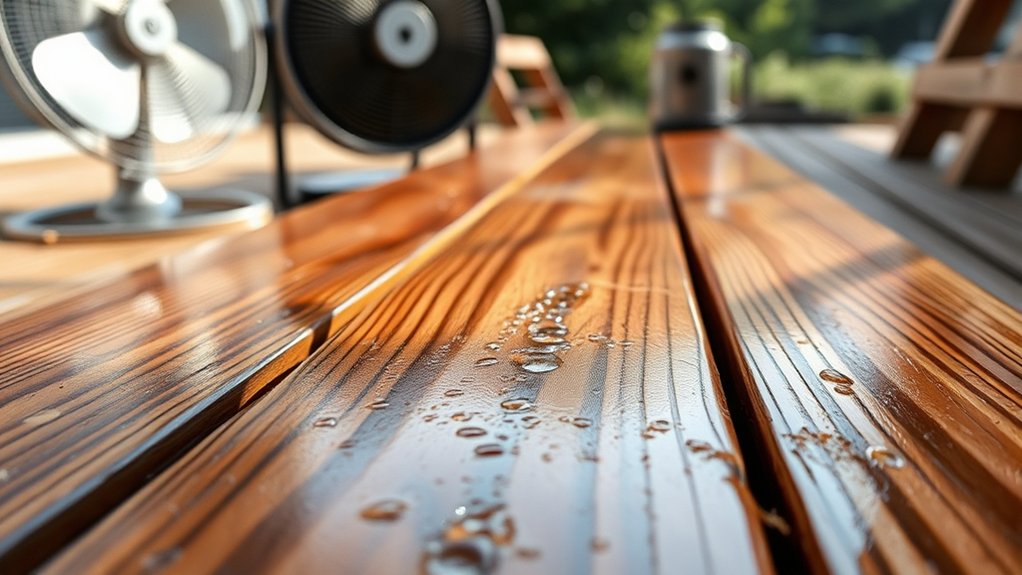
Enhance airflow by positioning fans nearby or placing the wood in a well-ventilated area to accelerate moisture escape.
In enclosed spaces, deploy dehumidifiers to lower humidity, which speeds up drying and reduces mold risk.
If you must apply a finish before the wood is fully dry, opt for thin coatings designed for damp surfaces. These can help draw out moisture.
Using these combined methods will assure your wood dries efficiently and is ready for a quality stain.
Just take your time with each step, and you’ll get great results.
Preparing Pressure Treated and Plywood for Staining
Staining pressure treated wood and plywood requires careful preparation to guarantee a durable, even finish. Since new pressure treated wood holds high moisture, you must wait weeks or even months before staining.
For plywood, moisture can linger at the edges despite a dry surface, impacting stain absorption.
To prepare effectively, perform the water bead test. If water beads, the wood’s too wet for staining; if it absorbs quickly, it’s ready.
Also, clean the surface thoroughly to remove dirt and contaminants that hinder stain adhesion.
Avoid using oil-based stains on damp wood, especially birch plywood, as they cause uneven, splotchy results.
Following these steps helps ensure your staining project on pressure treated wood and plywood turns out smooth and lasting.
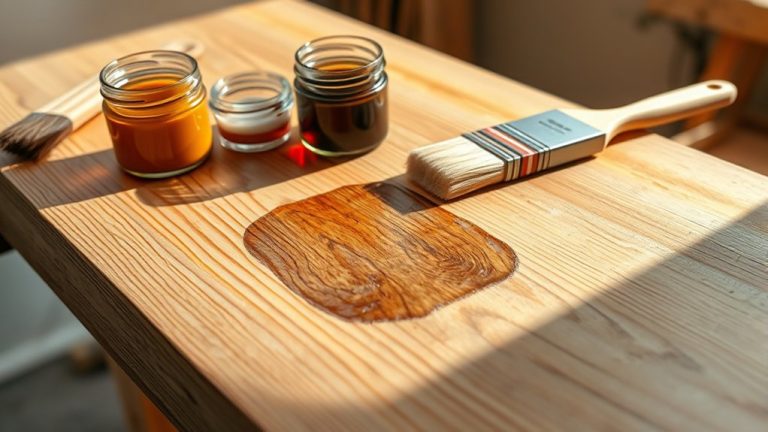
Stains and Paints That Work Better on Damp Wood
While waiting for wood to dry before applying stain is ideal, certain stains and paints actually work better on damp surfaces and can save you time.
Water-based stains often do a better job penetrating damp wood because they handle some moisture without the adhesion problems you usually get with oil-based stains.
Some deck stains, like those from Sherwin-Williams, are even made to be applied on wet wood.
Just be careful though, because you don’t want to run into long-term adhesion issues. Products designed specifically for damp conditions tend to bond well despite the moisture.
Before you go all in, it’s a good idea to test a small spot first.
That way, you can see how well the stain sticks and soaks in.
Using the right stains for damp wood means your finish will last longer and you won’t trap moisture under the surface.
Preventing Common Problems When Staining Damp Wood
Although you might be enthusiastic to finish your project, applying stain to damp wood can cause adhesion problems like peeling or flaking because of trapped moisture. To prevent these issues when staining damp wood, it’s important to take a few practical steps.
First, make sure the wood is clean and free from debris. This helps the stain absorb better.
Then, let the wood dry completely. Waiting for three consecutive dry days can help prevent mold and mildew growth.
Finally, use heat and increased airflow to speed up the drying process. This makes it easier to apply a new coat smoothly.
- Clean the surface thoroughly before staining
- Wait for the wood to dry fully to avoid trapped moisture
- Use heat and airflow to accelerate drying and prevent mold and mildew
Safe Ways to Use Damp Wood Temporarily
If you need to use damp wood temporarily, taking safety precautions is essential to avoid accidents and damage.
First, tent the area with a tarp to shield the wood from additional moisture. Apply grip tape on slippery surfaces to prevent slips while working.
Always monitor weather conditions to plan for at least three dry days before staining or painting.
Plan for a minimum of three dry days before staining or painting to ensure proper wood treatment.
To speed up drying, improve airflow and heat around the wood using fans or heaters, but make sure you don’t overheat or warp it.
Before any treatment, perform testing for readiness by using the water bead test. If water beads on the surface, the wood remains too wet for staining.
These steps help you work safely with damp wood while preparing it properly for a lasting finish.
Frequently Asked Questions
Can I Stain Wet Wood Indoors Without Proper Ventilation?
You shouldn’t stain wet wood indoors without proper ventilation. Moisture levels affect staining techniques, causing uneven finishes and poor adhesion. Without ventilation, trapped fumes create indoor safety hazards.
Proper wood preparation means waiting for dryness and ensuring airflow to prevent mold and rot.
It’s really important to prioritize ventilation to protect your health and get a smooth, durable stain. Always dry the wood fully and ventilate the area before starting your project.
How Long Should Stained Wood Cure Before Exposure to Rain?
Think of curing stained wood like waiting for a fine wine to mature. It needs time.
You should allow a cure duration of 24 to 48 hours before rain exposure. This guarantees moisture levels drop, and stain penetration completes properly.
Weather conditions like humidity and temperature affect this timing, so always check the manufacturer’s guidelines.
Proper wood preparation and monitoring forecasts help you avoid blotchy finishes and protect your wood’s beauty.
Does Wood Species Affect Staining Results on Damp Wood?
Yes, wood species considerably affect staining results on damp wood because wood properties like moisture content and absorption rates vary.
You’ll notice that oily woods resist stain, while porous ones absorb unevenly. Proper surface preparation is essential to manage these differences.
Adjust your staining techniques based on the species to avoid blotchy finishes.
Knowing your wood’s characteristics helps you tailor your approach for consistent, professional results, even when damp.
Can Additives Improve Stain Absorption on Slightly Wet Wood?
Yes, additives can improve stain absorption on slightly wet wood by adjusting moisture content and enhancing stain effectiveness. Different additive types alter surface tension, boosting absorption rates despite dampness.
You’ll want to choose additives that are compatible with your stain and follow recommended application techniques carefully to avoid uneven results.
Testing a small area first helps you gauge how well the additive works with your wood’s moisture level.
This way, you can ensure a smooth, lasting finish without any surprises. It’s all about finding the right balance and being a bit patient with the process.
Is It Safe to Use Electric Tools on Wet Wood Surfaces?
You’ll want to think twice before using electric tools on wet wood surfaces. For your safety, always follow safety precautions. Moisture levels can turn your tools into unexpected conductors.
Wet conditions can also hamper tool performance and cause damage over time. Instead, focus on proper drying techniques to bring wood to ideal moisture levels first.
If you must work with wet wood, consider electric tool types like battery-operated ones. They handle dampness more gracefully and are generally safer to use in those conditions.
Conclusion
Staining wet wood often leads to poor adhesion and uneven color. Studies show that over 60% of stain failures happen because of moisture issues. So, it’s really important to check for dampness before you start.
If the wood is wet, try to dry it quickly. You can also choose stains that are made for damp conditions when needed. Taking these steps will help you get a durable and attractive finish.
Doing this not only saves you time but also spares you a lot of frustration. Remember, properly preparing your wood is the key to a professional-looking result every time.