Can You Re Stain Wood: Simple Guide For Better Finish
Yes, you can re-stain wood for a better finish by first ensuring the surface is clean, dry, and lightly sanded to open the pores. Choose a stain compatible with your wood type. Water-based works well for softwoods, and oil-based is great for hardwoods.
Always test the stain in a hidden spot first to see how it reacts. Apply a pre-stain conditioner before you start staining. Then, stain evenly, wiping off any excess.
Make sure to allow proper drying time before sealing. Use thin coats of sealant and sand lightly between each layer. Keep following for expert tips to perfect your wood refinishing project.
When’s the Best Time to Re-Stain Wood?

When should you re-stain wood to keep it looking its best? You should consider re-staining when the existing finish looks worn, faded, or damaged. This usually happens every 3-5 years outdoors and 5-10 years indoors.
Before you begin, make sure the wood is dry and free from dirt, grease, or old finishes. Moisture can stop the stain from sticking properly. For the best drying, pick a day with temperatures between 50°F and 90°F and low humidity.
Lightly sand the surface with fine-grit sandpaper to remove imperfections and help the stain absorb evenly.
It’s a good idea to apply a test stain on a small, hidden area first. This way, you can check if it works well with the existing finish and see what the final color will look like.
Following these steps will help you get the best results with your re-staining project.
How to Choose the Right Stain for Your Project
Start by figuring out what type of wood you’re working with. Softwoods usually go well with water-based stains, while hardwoods tend to do better with oil-based options.
Then, think about the kind of finish you want. Gel stains are great if you need more control, especially on vertical surfaces. On the other hand, classic stains let you build up depth by applying multiple coats.
Before you dive into the whole project, it’s a good idea to test your stain on a small, hidden spot first. This way, you can make sure it looks right and works well with your wood.
Stain Types Overview
Although choosing the right stain can seem challenging, understanding the main types: water-based, oil-based, and gel stains will help you match your project’s needs to the best product.
Water-based stains dry quickly and have low odor, making them ideal for softwoods and indoor projects.
Oil-based stains penetrate deeply, offering durability for exteriors and high-wear surfaces, but they require longer drying times.
Gel stains have a thicker consistency, which reduces drips on vertical surfaces. This makes them beginner-friendly and easier to control.
For effective stain selection, consider the wood species and desired finish. Lighter stains suit softer woods, while darker stains highlight hardwood grains.
Always perform testing on scrap wood from your project to preview the color and finish on different wood types.
This stain types overview guarantees you choose the right stain confidently and achieve the best results.
Wood Compatibility Considerations
Since different woods absorb stain uniquely, choosing the right type based on wood compatibility is essential for achieving an even, lasting finish. Consider the wood’s grain pattern and whether you need a Wood Conditioner to prevent blotchiness. Softer woods often require water based stains, while hardwoods favor oil-based.
Always test stain color on a hidden spot before you apply directly. Also, think about finish compatibility. Applying clear coats too soon can ruin adhesion.
| Wood Type | Recommended Stain | Notes |
|---|---|---|
| Pine (softwood) | Water based | Use Wood Conditioner to avoid blotches |
| Oak (hardwood) | Oil based | Enhances grain pattern |
| Mahogany | Gel stain | Apply with pressure for deep penetration |
| Ash | Oil or Gel stain | Large pores benefit from careful application |
| General | Test first | Check stain color and finish compatibility |
How to Prepare Wood Before Re-Staining
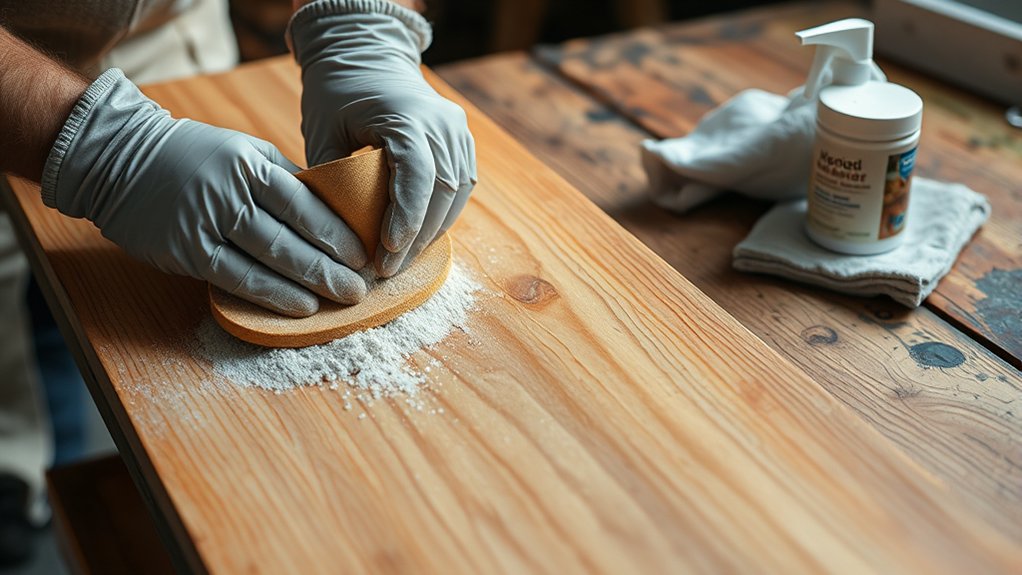
Begin by lightly sanding the wood’s existing finish with medium (#120) to fine (#220) grit sandpaper. This creates a smooth surface that helps the new stain stick properly.
To prepare the wood effectively, follow these steps:
Lightly sand to remove the old finish and smooth out any imperfections.
Next, remove dust and debris thoroughly using a vacuum or a damp cloth to guarantee a clean surface.
If the original stain is dark, apply a wood conditioner to avoid uneven color absorption.
It’s a good idea to test the new stain on a hidden area first to make sure it matches your desired color.
Finally, allow the wood to dry completely after sanding and cleaning to prevent any adhesion problems.
Properly preparing the wood like this will minimize uneven color and improve the durability of your re-stain finish.
Step-by-Step Guide to Re-Staining Wood
Before applying a new stain, you’ll want to thoroughly clean the wood surface to remove any dirt, oils, or residues that could interfere with stain adhesion.
Next, lightly sand the wood with 120 to 220-grit sandpaper to smooth the surface and open the pores for better absorption.
Apply a pre-stain wood conditioner, especially for softwoods, to guarantee a uniform color and prevent blotching. It’s a simple step that really makes a difference.
Test the stain color on a hidden area to confirm it matches your expectation.
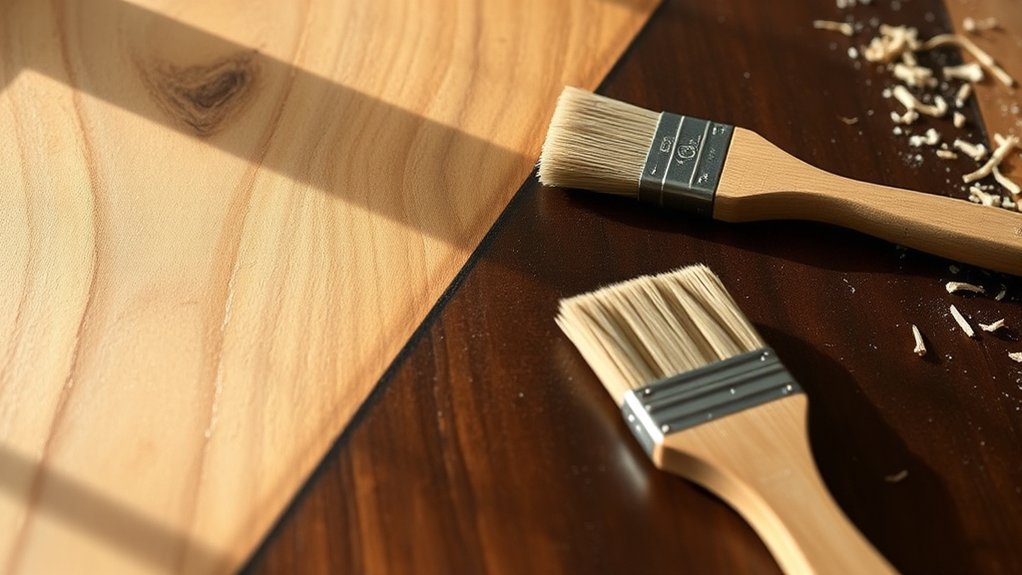
Once you’re happy with the color, evenly apply the stain using a brush or cloth, following wood finishing best practices.
Allow the stain to dry completely before deciding if you want a second coat.
If you do, apply it for a deeper, richer color, and be sure to follow the manufacturer’s recommended drying times for the best results.
Common Mistakes to Avoid When Re-Staining Wood
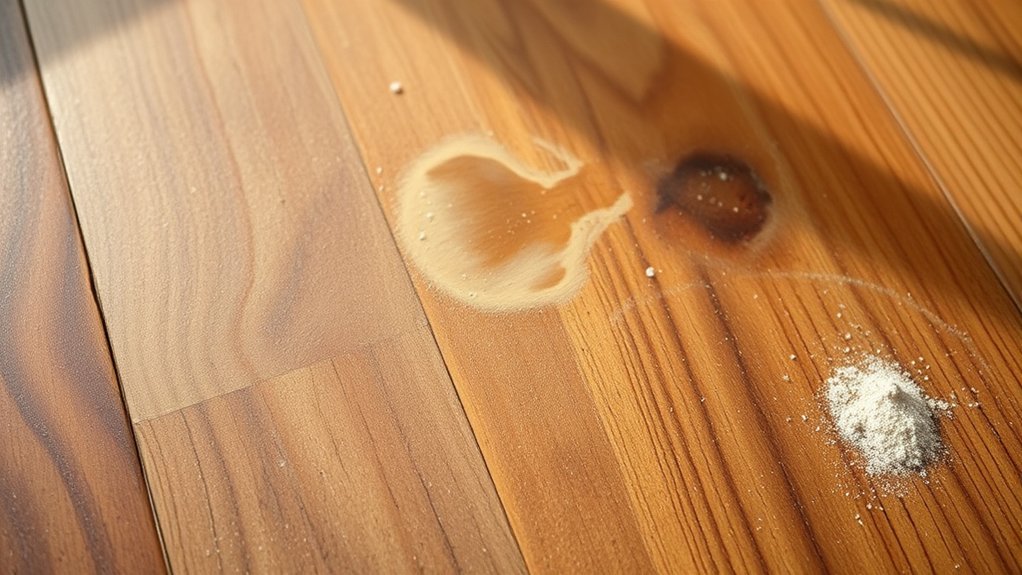
When re-staining wood, you need to remove the previous finish completely to avoid uneven absorption and blotchy results. Skipping this step leads to poor adhesion and inconsistent color.
Avoid these common mistakes:
Failing to sand with progressively finer sandpaper leaves a rough surface that causes uneven stain penetration.
Also, neglecting to test the new stain on a hidden area means you mightn’t know how the color will really look or if it works well with the wood.
Not wiping off the excess stain promptly can result in sticky patches or uneven tone.
Plus, applying coats without allowing sufficient drying time (24-48 hours) compromises the finish’s durability and depth.
Overlooking complete removal of the previous finish causes blotches and uneven stain absorption.
Tips for Fixing Uneven Color and Patchiness
Although uneven color and patchiness can be frustrating, you can fix these issues by carefully sanding the affected area with fine-grit sandpaper (#220). This helps smooth the surface and improves stain absorption.
Next, apply a pre-stain wood conditioner to guarantee even color, especially on porous woods. It’s a good idea to test the stain on a hidden spot before applying it broadly to avoid surprises.
For patchy spots, use a gel stain that’s slightly darker than the base color, and blend it carefully. If problems still persist, a stain remover can strip the uneven finish for a fresh start.
| Step | Tool/Material | Tip |
|---|---|---|
| Light sanding | Fine-grit sandpaper #220 | Smooth surface for even stains |
| Apply conditioner | Pre-stain wood conditioner | Enhances uniform absorption |
| Patch and blend | Gel stain | Use darker tone, blend seamlessly |
Best Practices for Drying and Sealing Re-Stained Wood
You’ll want to dry your re-stained wood in a controlled environment between 70°F and 80°F with low humidity for at least 24 hours. This helps ensure the stain adheres properly.
Once it’s dry, go ahead and apply a clear finish—something like polyurethane or spar urethane works great. This not only protects the surface but also makes the color pop.
And don’t forget to sand lightly between coats; it really helps create a smooth, durable seal.
Optimal Drying Conditions
Maintaining ideal drying conditions is essential for achieving a smooth, durable finish on re-stained wood. To guarantee optimal drying conditions before you apply a clear finish, control temperature and humidity carefully. Follow these guidelines:
Keep the temperature between 70°F and 80°F (21°C to 27°C) with humidity levels at 30-50% for consistent drying times. Allow each stain coat to dry for at least 24 hours to guarantee proper adhesion and color uniformity.
Use a fan or dehumidifier to improve airflow and reduce moisture, preventing extended drying periods. Opt to apply a water-based sealer for faster drying, usually within 2 to 4 hours.
Always consult the manufacturer’s instructions to confirm specific drying times and environmental requirements.
These steps help you achieve the best results when re-staining and sealing wood.
Effective Sealing Techniques
Before applying a sealer, make certain each stain coat has dried thoroughly, usually 24 to 48 hours. This helps prevent issues like cloudiness or poor adhesion.
Choose finishing products wisely. Water-based poly dries faster and has less odor, while oil-based sealers add durability and a warm amber hue.
Always test your sealer on a small, hidden area first to check compatibility with your staining. When you apply the sealer, apply thin coats evenly to avoid sticky spots or blotches.
Between coats, perform light sanding with 220-grit sandpaper to improve adhesion and create a smooth surface.
Repeat this process until you achieve the desired protective finish.
Following these steps guarantees your re-stained wood looks flawless and stays well-protected for years.
How to Maintain and Protect Your Re-Stained Wood Finish
Although re-staining wood revitalizes its appearance, protecting that finish requires consistent care.
To keep your re-stained wood looking its best, follow these essential maintenance steps:
Regularly clean the surface with a damp cloth to remove dust and prevent buildup that can dull the finish.
Apply a protective sealant like water-based polyurethane every few years to strengthen durability and resist moisture damage.
Avoid placing hot or wet items directly on the wood to prevent marks and finish deterioration.
Use coasters and placemats to shield the surface from scratches and stains caused by everyday use.
Maintain consistent humidity levels in your environment to minimize wood expansion or contraction that can compromise the finish.
Taking these simple steps will help your wood stay beautiful for years to come.
Frequently Asked Questions
Can I Re-Stain Wood Furniture That Has Paint on It?
Yes, you can re-stain wood furniture that has paint on it by using effective paint removal techniques like chemical strippers or a heat gun.
Just make sure you follow the wood preparation steps carefully. Start by stripping the paint, then sand the surface thoroughly, and clean it well.
Next, choose the best stain options for your wood type. Applying a conditioner can help with color matching, making the finish look more even and natural.
Don’t forget to respect drying times before you seal the wood.
Taking good care of your furniture and considering the durability of the finish will guarantee a lasting, beautiful result you’ll love. It’s definitely worth the effort!
How Long Does Re-Staining Wood Typically Take to Complete?
Re-staining wood typically takes 2 to 3 days, depending on your wood type and finish.
Start with thorough surface preparation, like cleaning and sanding, to guarantee proper stain application.
Each coat needs 4 to 24 hours drying time. Oil-based stains dry slower than water-based ones, so keep that in mind.
It’s best to apply multiple thin coats and then seal with a clear finish.
The clear finish adds another 24 to 48 hours of drying time.
Being patient really pays off—it guarantees a smooth, durable result you’ll be happy with.
Is It Safe to Re-Stain Wood in Humid or Cold Weather?
You shouldn’t re-stain wood in high humidity or cold weather because humidity effects slow drying time and reduce wood absorption, causing blotchy finishes.
Cold weather extends drying time and weakens stain durability.
To improve results, choose stains made for these conditions, apply thin coats, and guarantee proper ventilation.
Weather considerations matter. Wait until temperatures stay above 50°F with humidity below 70% for ideal application techniques and lasting results.
Can I Use the Same Stain Brand for Re-Staining Different Types of Wood?
Yes, you can use the same stain brand for re-staining different wood types, but it’s important to focus on stain compatibility and preparation steps.
Always test on a small area first to make sure the color matches. This helps you adjust your application techniques if needed.
Make sure to sand the surface well. This will help the stain adhere better and give you a more even, durable finish.
Remember, drying times can vary depending on the wood’s porosity and the type of stain you’re using.
What Tools Are Best for Applying Stain to Intricate Wood Designs?
For intricate wood designs, use staining brushes and foam applicators. They give you precise control without leaving brush marks.
Cloth rags come in handy to wipe away any excess stain smoothly.
Detail sprayers and stain pens are great for targeting tiny crevices and patterns effectively. Stencil tools help you get sharp, clean edges every time.
Plus, sanding sponges prepare the surface so the stain absorbs better.
Using a mix of these tools ensures even, detailed coverage. This way, your complex woodwork gets a flawless finish that really stands out.
Conclusion
Re-staining wood is like giving your project a fresh coat of life. You just need the right timing, prep, and patience. Follow each step carefully, avoid common pitfalls, and fix any uneven spots promptly.
Don’t rush drying or sealing, because these steps lock in your hard work. With proper maintenance, your re-stained wood will stay stunning for years. Take your time, and you’ll transform tired wood into a beautiful masterpiece.