Can You Stain Fake Wood: Techniques For Realistic Finish
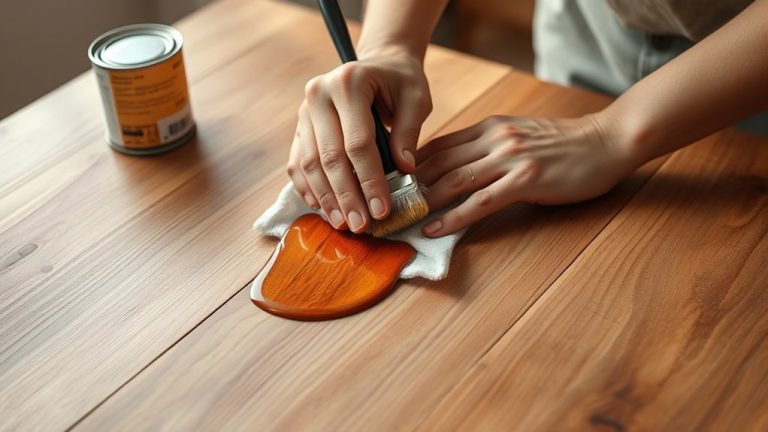
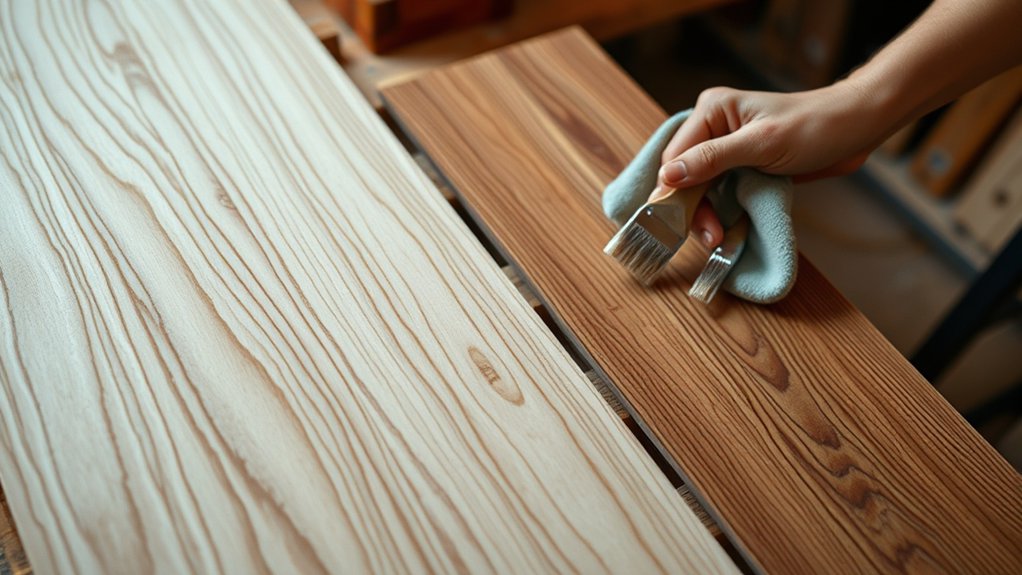
You can’t use traditional stains on fake wood because its sealed, non-porous surface prevents absorption. Instead, start by cleaning it with water and denatured alcohol. Then apply liquid wood or gel stains for authentic texture and color control.
Lightly sand between coats and follow the grain direction for realism. Finish with a clear sealer to protect the look.
If you want to master the process fully, there are advanced techniques that enhance color depth and durability you’ll want to explore.
Key Takeaways
- Traditional stains do not adhere well to fake wood due to its non-porous, sealed surface, requiring special products for staining.
- Liquid wood with real wood content improves texture and grain visibility, enabling more authentic faux wood finishes.
- Use gel stains instead of penetrating stains for better adhesion and control on laminate or fake wood surfaces.
- Apply multiple thin coats with light sanding between layers and seal with polyurethane or polycrylic for durability.
- Employ wood graining tools and paint techniques following the grain direction to mimic natural wood patterns realistically.
Why Traditional Stains Don’t Work on Fake Wood
Although traditional stains work well on real wood, they don’t stick to fake wood because laminate surfaces are non-porous and sealed.
Traditional stains rely on soaking into the porous fibers of natural wood to bring out the grain and color. Since laminate has a sealed finish, it won’t absorb the stain.
This means the stain just sits on top without bonding properly, which leads to uneven and unrealistic results.
Plus, fake wood doesn’t have real grain and can’t be sanded like real wood, so you can’t expect traditional stain methods to do the trick.
If you want a convincing stained look on laminate, you’ll need special products and techniques made for non-porous surfaces.
Knowing why traditional stains don’t work helps you pick better options that mimic wood’s depth without messing up laminate’s protective layer.
How Liquid Wood Makes Laminate Look Like Real Wood
You’ll find that liquid wood contains about 65% real wood, which is why laminate surfaces can mimic genuine wood grain so well.
It’s pretty cool how that works!
When you’re ready to apply it, start by cleaning the laminate really well.
Then, go ahead and apply 2-3 coats, making sure to do a light sanding between each one.
This helps get a nice, smooth finish.
To wrap things up, use gel stains and seal everything with oil-based polyurethane.
This not only makes your surface durable but also gives it a natural, wood-like look that lasts.
Liquid Wood Composition
Because liquid wood products like Ritikit contain 65% real wood, they can convincingly replicate the texture and appearance of natural wood on laminate surfaces. This unique composition allows the liquid wood to bond seamlessly, giving laminate a realistic wood grain feel without extensive preparation.
Key aspects of liquid wood composition include:
- High wood content (65%) for authentic texture
- No need for sanding or primer on smooth surfaces
- Compatibility with wood graining tools for enhanced realism
- Ability to build up layers with 2-3 coats for depth
- Requires sealing with polycrylic or oil-based polyurethane for durability
Application And Drying
Liquid wood’s high wood content gives laminate surfaces a convincing texture, but getting a truly realistic finish depends on careful application and drying techniques. Start by cleaning the laminate with water and denatured alcohol. You won’t need to sand or use primer unless the surface is damaged.
Apply 2-3 coats, sanding lightly between each one to bring out the wood grain. When you get to the final coat, make sure to follow the direction of the grain closely. Using a hair dryer can help you monitor the drying progress and avoid pooling or uneven spots.
| Step | Action | Purpose |
|---|---|---|
| 1 | Clean surface | Remove contaminants |
| 2 | Apply 2-3 coats | Build texture |
| 3 | Sand between coats | Smooth and enhance grain |
| 4 | Dry following grain lines | Guarantee even finish |
Doing it right means your laminate will convincingly mimic real wood.
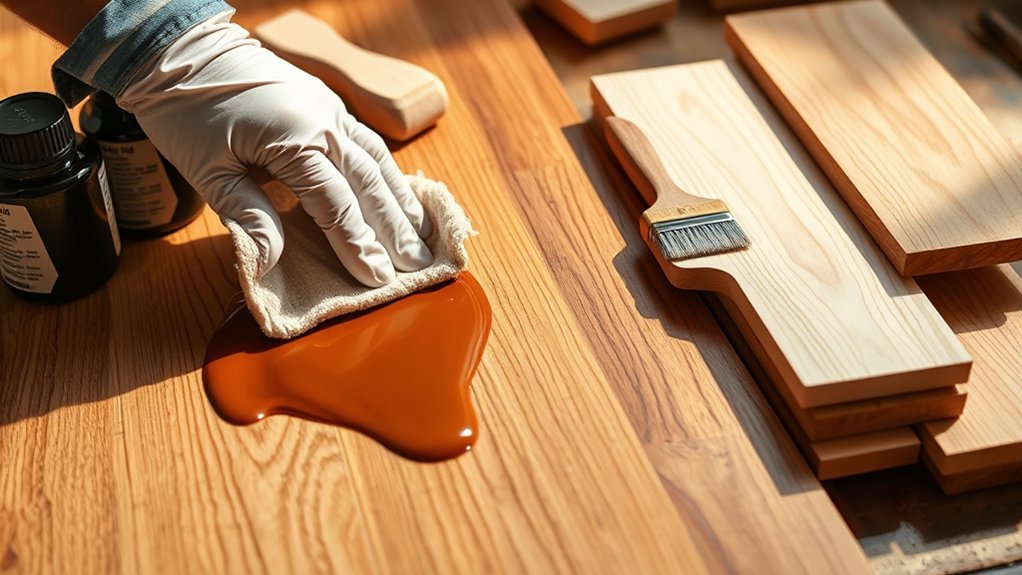
Staining And Sealing
Three thin coats of polycrylic or oil-based polyurethane seal your laminate surface after applying liquid wood. This guarantees durability and a realistic wood sheen.
Staining with liquid wood, which contains 65% real wood, transforms laminate by adding authentic texture without sanding or primer unless the surface is damaged.
Apply 2-3 coats of liquid wood, sanding lightly between each to smooth streaks and enhance adherence. Use a wood graining tool to mimic natural patterns.
Follow the grain direction during staining and sealing for the best effect. No primer is needed on intact laminate. Light sanding between coats improves the finish.
Using wood graining tools adds great texture. Always follow the wood grain for a natural look. Finally, seal with three thin polyurethane coats for protection.
This method guarantees your laminate convincingly resembles real wood.
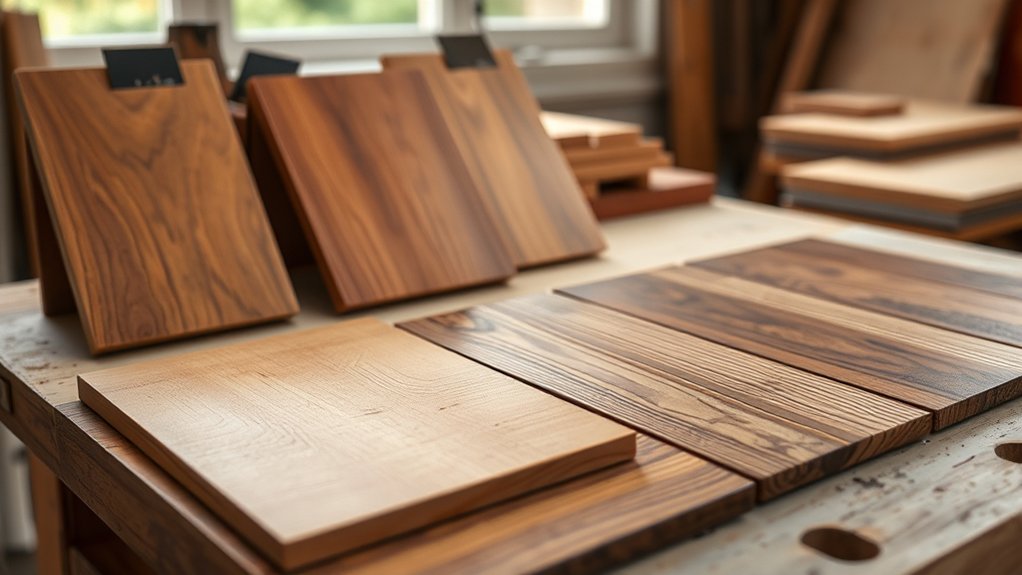
Choosing Paints and Stains for Fake Wood Finishes
When you’re picking out paints and stains for fake wood finishes, a great place to start is with latex craft paints like Unicorn Spit. These paints can be thinned down to create translucent effects that really mimic the look of wood grain.
Just keep in mind, when you’re working with laminate, it’s best to steer clear of penetrating stains. Instead, go for gel stains because they stick better.
Also, mixing your colors carefully can make a big difference in getting the tones just right. For example, adding white can lighten up your colors, while blending black with brown helps you achieve those deeper, richer shades.
It’s all about experimenting to find the perfect look!
Paint Types Overview
Although selecting the right paint or stain can seem intimidating, understanding the properties of different types helps you create convincing fake wood finishes.
Using the proper paint brush is essential for smooth application and detail work. Here are key paint types and tips to reflect upon:
- Latex Craft Paint: Thinned with water for translucent, stain-like effects on laminate.
- Liquid Wood Products: Contain wood fibers, enhancing realism without sanding or priming.
- Gel Stains: Offer richer color and better coverage over liquid wood bases.
- Color Mixing: Adjust tones carefully with white, black, and brown to mimic wood hues.
- Sealing: Always finish with polycrylic or oil-based polyurethane for durability and sheen.
Mastering these options guarantees your fake wood finish looks authentic and lasts long.
It’s really about experimenting a bit and finding what works best for your project. You’ll get the hang of it in no time!
Stain Compatibility Tips
Because selecting compatible stains and paints is essential for achieving authentic fake wood finishes, you should prioritize latex craft paints diluted with water for translucent effects and gel stains designed to work with liquid wood products.
These options guarantee proper adhesion and avoid oversaturation, which is critical when applying the stain to laminate surfaces.
As part of stain compatibility tips, always test your chosen wood stain on a small, hidden area to verify color and bonding before full application.
This simple step prevents unwanted results and guarantees a realistic finish.
Remember, gel stains outperform penetrating stains on fake wood by providing better control and a richer look.
Achieving Desired Tones
To achieve realistic tones on fake wood, you’ll want to start by mixing latex craft paint with water to create a translucent stain that closely mimics natural wood finishes. This technique is essential for achieving desired tones that resemble real wood. It really helps enhance your home improvement project’s authenticity.
Consider these steps: add white paint for lighter hues or blend black and brown for deeper shades. Use long, controlled strokes to avoid oversaturation and protect the laminate surface.
Apply multiple thin coats, letting each dry fully for depth. If the color gets too intense, just wipe the excess stain with a damp cloth.
You can also use a wood graining tool to mimic natural grain patterns and boost realism. This methodical approach guarantees your fake wood finish achieves the tone and texture of real wood effectively.
How to Apply a Paint-Based Stain on Laminate
When you want to achieve a paint-based stain on laminate, start by mixing latex craft paint with water until you reach a translucent consistency that resembles traditional wood stain. Use a craft paintbrush to apply the mixture in long, even strokes, avoiding oversaturation to protect the laminate surface.
You can adjust tones by adding white for lighter shades or blending black and brown for darker hues. Apply multiple coats, letting each dry fully before the next. If the color gets too dark, just wipe the excess off with a damp cloth.
Finally, seal your work with a clear coat like polycrylic or polyurethane to guarantee durability.
| Step | Action |
|---|---|
| Mix | Paint + Water to translucent |
| Apply | Long strokes, avoid oversaturation |
| Finish | Seal with clear coat |
Using Gel Stains and Wood Graining Tools on Laminate
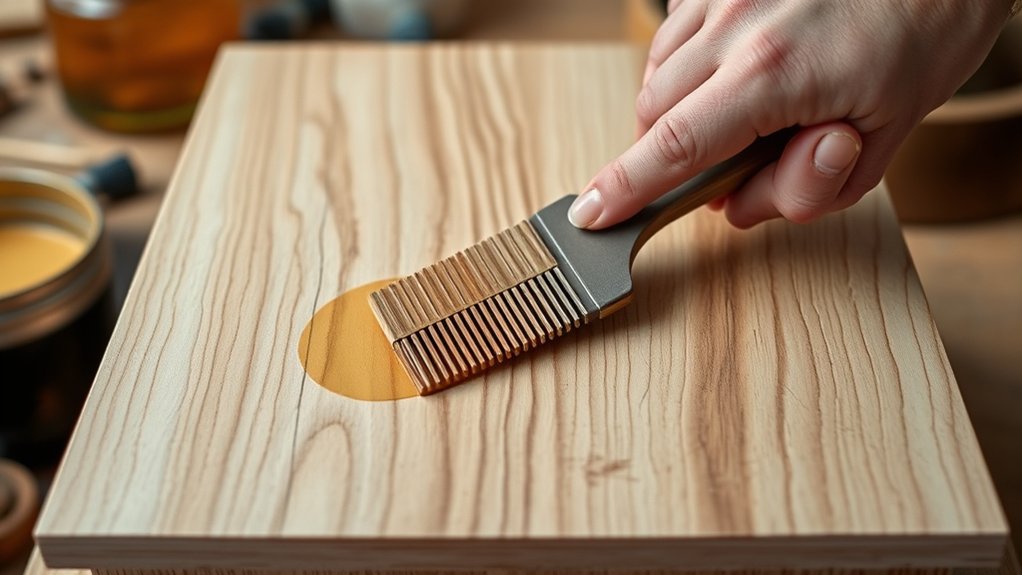
Although gel stains don’t penetrate laminate like traditional stains, their thicker consistency allows them to adhere well and create a realistic wood finish. When using gel stains on laminate, apply them with a light touch, following the grain direction to mimic natural wood.
To boost authenticity, drag a wood graining tool through the wet gel stain, forming wood-like patterns and textures. It’s a simple trick that really makes a difference.
Keep these tips in mind: use gel stains for better adhesion on laminate and apply gently along the laminate grain.
Employ wood graining tools to add texture.
Make sure to let the gel stain dry fully before moving on to the next steps. And don’t rush sealing—wait until the stain is completely dry to avoid smudging.
This method transforms laminate surfaces, giving you a convincing faux wood appearance without needing any penetration. It’s a great way to refresh your laminate with a natural look.
How to Seal and Protect Your Faux Wood Finish
Even though applying a sealer might seem straightforward, choosing the right product and technique is essential to protect your faux wood finish effectively. Use a high-quality polycrylic or polyurethane. Oil-based sealers offer greater durability but may yellow, while water-based sealers maintain color clarity.
Apply three thin coats, sanding lightly between each to improve adhesion and smoothness. Always follow manufacturer instructions for drying times.
| Sealer Type | Durability | Finish Effect |
|---|---|---|
| Oil-Based Polyurethane | High | Slight amber tint |
| Water-Based Polycrylic | Moderate | Clear, non-yellowing |
| Hybrid Sealers | Balanced | Durable and clear |
This method guarantees a lasting, realistic faux wood finish that’s both sealed and well-protected. It’s a simple step that makes all the difference in keeping your project looking great for years.
Tips for Matching Stain Colors to Real Wood Tones
Achieving an accurate match to real wood tones requires careful observation of the wood’s base color and undertones, whether warm, cool, or neutral.
When working with fake wood, you need to tailor your stain colors accordingly for the most realistic finish.
Start by identifying the wood species and its undertones first.
Then, mix craft paints with water to create a translucent stain-like consistency. You can adjust mixtures by adding white for lighter tones or black and brown for darker ones.
Always test your stain on a hidden area to verify color accuracy.
Apply multiple thin coats, letting each dry fully to build depth.
Following these tips will help you replicate authentic wood hues on faux surfaces with precision and control.
Common Mistakes to Avoid When Staining Fake Wood
Why do some staining projects on fake wood fall short of expectations? Often, it’s due to common mistakes you can easily avoid.
First, make certain you don’t use regular penetrating stains because they won’t adhere well to laminate surfaces. Instead, choose gel stains or liquid wood products designed for fake wood.
Surface preparation is essential. Clean thoroughly with water and denatured alcohol to guarantee proper adhesion.
Avoid over-saturating the surface. Apply thin layers and build up gradually. Also, be patient. Allow each coat to dry fully before applying the next to prevent streaks and dullness.
Finally, don’t skip sealing. Applying a protective layer like polycrylic or polyurethane guarantees durability and prevents chipping. This will help your stained fake wood look great in your home for years.
Frequently Asked Questions
Can You Stain Fake Wood Without Sanding First?
Yes, you can stain fake wood without sanding first, but stain adhesion depends on proper surface prep.
Clean the surface thoroughly with a water and denatured alcohol solution to remove oils and dirt that block adhesion. Use specialized stains or diluted paints designed for laminate surfaces.
Apply thin coats with long strokes for a natural look. Sealing afterward guarantees durability.
Skipping sanding demands extra care to achieve a strong bond and realistic finish. Just take your time and be patient to get the best results.
How Long Does Stained Fake Wood Take to Dry?
You’ll feel like you’re waiting an eternity, but stained fake wood usually takes about 1 to 2 hours to dry to the touch.
Drying factors like humidity, temperature, and the type of stain affect this time. Water-based stains dry faster than oil-based ones.
For multiple coats, wait 2 to 4 hours between applications.
Using a fan helps speed up drying, but avoid direct heat to protect the surface.
It’s all about finding the right balance to get the best finish without rushing.
Is Staining Fake Wood Safe for Indoor Use?
Yes, staining fake wood can be safe for indoor use if you prioritize indoor safety. Use non-toxic, water-based stains and make sure you have good ventilation while working.
Applying liquid wood products with real fibers helps you get a realistic finish without messing with the air quality.
Just be sure to allow enough drying and sealing time to keep chemical off-gassing to a minimum.
Can Fake Wood Be Stained Outdoors?
Staining fake wood outdoors is like painting on a moving canvas. You can do it, but it requires care.
To guarantee outdoor durability, choose a stain specifically formulated for synthetic surfaces and outdoor use.
Make sure to clean the surface thoroughly to remove dirt and oils before applying the stain evenly.
Keep in mind that exposure to UV rays and moisture means you’ll need regular maintenance and reapplication.
This way, you can keep that realistic finish looking sharp for longer.
Just stay on top of it, and your fake wood will look great outdoors!
Will Staining Fake Wood Affect Its Texture?
Staining fake wood won’t affect its texture because the surface remains non-porous and smooth.
You’ll achieve a visual change without altering the tactile feel. There’s no real grain to penetrate.
If you want to enhance the texture impact, consider using wood graining tools or liquid wood products to simulate the appearance of wood grain.
Just remember, while stains improve the look, the actual texture stays consistent with the original fake wood material.
Conclusion
Staining fake wood might sound tricky, but with the right techniques, you can transform it into a convincing wood finish. Think of it as painting a canvas—you control every stroke, shade, and texture.
By choosing suitable stains, applying paint-based or gel stains carefully, and sealing your work, you bring faux wood to life. Avoid common pitfalls, and soon, your project won’t just look like wood. It’ll feel like it too.