How To Tighten A Chainsaw Chain – Quick Adjustment Steps
To tighten your chainsaw chain, first make sure the saw is off and cool. Loosen the guide bar nuts using a properly sized scrench. Then, turn the chain tension screw clockwise to snug the chain against the guide bar, but still allow slight movement.
Next, lift the bar nose slightly while retightening the guide bar nuts to keep the chain aligned. It’s a good idea to perform a snap test by pulling the chain to confirm the proper tension. This way, you’ll know it’s just right.
Following these steps helps improve safety and performance. And if you want more detailed maintenance tips, there are plenty of resources available to guide you further.
How To Know When Your Chainsaw Chain Is Too Loose
How can you tell if your chainsaw chain is too loose? First, check if you can pull the chain away from the guide bar more than a quarter of an inch without resistance. If so, you have a loose chainsaw chain that requires adjustment.
Another clear sign is if the drive links visibly disengage from the bar nose. A properly tensioned chain should fit snugly against the bar but still allow slight movement when pulled.
If the drive links pull away from the bar nose, your chainsaw chain is too loose.
Overly slack chains increase the risk of kickback and may derail during use, compromising safety. Regularly inspect chain tension, especially after the first 30 minutes of operation.
Use the chain tensioning screw to make precise adjustments, ensuring the chain maintains ideal tension for safe, efficient cutting.
Tools Needed For Chain Tension Adjustment
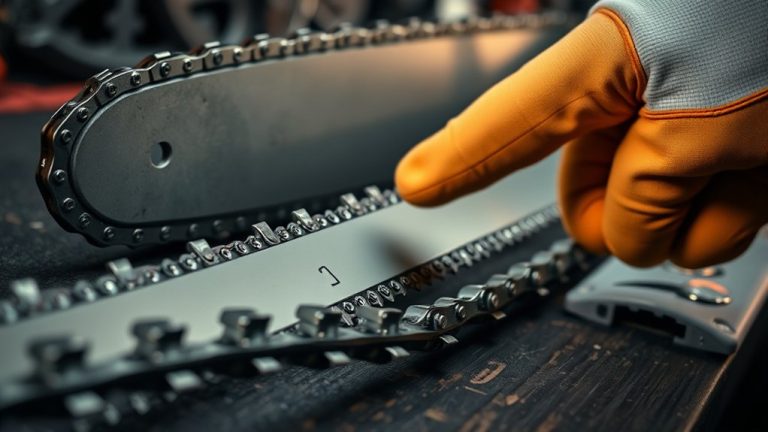
You’ll need a properly sized scrench to loosen the guide bar nuts and adjust the tensioning screw without causing any damage.
It’s important to use the right tool to make the process easier and safer.
Some models might also require a flat file for chain maintenance.
So, it’s a good idea to check your owner’s manual to see which tools are compatible with your specific chainsaw.
And don’t forget—always wear gloves to protect your hands from sharp edges while you’re adjusting the chain.
Safety first!
Essential Tensioning Tools
Before adjusting your chainsaw chain tension, gather the essential tools to guarantee a safe and effective process. The primary tool you’ll need is a scrench, which combines a screwdriver and wrench. It’s perfect for loosening side panel nuts and turning the adjustment screw.
Always use a flat surface to stabilize the chainsaw, preventing slips while you work. Don protective gloves to maintain grip and protect your hands.
Inspect your tools for wear to avoid ineffective adjustments or damage. Here’s a quick overview of the essential tensioning tools:
| Tool | Purpose |
|---|---|
| Scrench | Loosens nuts and adjusts tension screw |
| Flat Surface | Stabilizes chainsaw during adjustment |
| Protective Gloves | Enhances grip and safeguards hands |
Tool Compatibility Guide
Selecting the right tool for adjusting your chainsaw chain tension is critical to maintaining ideal performance and preventing damage. This tool compatibility guide highlights that most chainsaws include a scrench, a combined screwdriver and wrench tailored for chain tension adjustments and guide bar nut loosening.
Confirm your scrench matches your chainsaw model’s specifications. Using the wrong size risks component damage.
Some models require a flathead screwdriver or a specialized tensioning tool. It’s always best to refer to your owner’s manual for exact requirements.
Chainsaws with Quick Tensioning Systems simplify this process with a dial or lever, eliminating the need for traditional tools.
Regularly inspect your scrench and other adjustment tools for wear to guarantee smooth, safe tensioning. Following this guide confirms precise chainsaw chain tension adjustments without compromising your equipment.
Taking these steps helps keep your chainsaw in top shape.
Prepare Your Chainsaw For Safe Tensioning
Before you start adjusting the chain tension, make sure the chainsaw is completely turned off and the engine has cooled down. This helps you avoid burns.
Also, put on gloves and safety glasses to protect your hands and eyes while you work.
Next, position the chainsaw on a stable, flat surface with the chain facing up. Doing this will help you keep control as you make the adjustments.
Safety Gear Essentials
Protective gear forms the foundation of safe chainsaw chain tensioning. Before you start, always wear protective gloves to shield your hands from sharp chain components and prevent injuries.
Safety precautions require you to don safety glasses to protect your eyes from flying debris during adjustments.
Don’t overlook sturdy, non-slip footwear to maintain solid footing and avoid slips. If you’re working in noisy environments, use hearing protection to guard against the chainsaw’s loud sounds.
When overhead hazards exist, wear a hard hat to protect your head from falling objects.
Equipping yourself with this essential safety gear minimizes risks and guarantees you can focus on precise chain tensioning without distraction or injury.
Prioritize these protective measures every time you prepare your chainsaw. It’s all about staying safe and getting the job done right.
Chainsaw Shutdown Procedures
When preparing to adjust your chainsaw chain, always shut down the engine and disconnect the power source.
Remove the spark plug on gas models or the battery on electric ones to eliminate any risk of accidental startup.
Chainsaw shutdown procedures are critical for proper safety and effective tensioning.
Always make certain you follow these steps before proceeding:
- Disengage the chain brake to allow free movement of the chain for accurate adjustment.
- Lay the chainsaw on a stable, flat surface with the guide bar facing upwards to prevent slipping.
- Clear the surrounding area of debris and wear protective gloves and safety glasses to minimize hazards.
Following these steps guarantees proper safety and prepares your chainsaw for safe, precise chain tensioning.
It’s always better to be cautious and take your time with these procedures.
Step 1: Loosen Guide Bar Nuts To Free Chainsaw Chain
Start by ensuring your chainsaw is switched off and the chain has cooled completely to prevent injury.
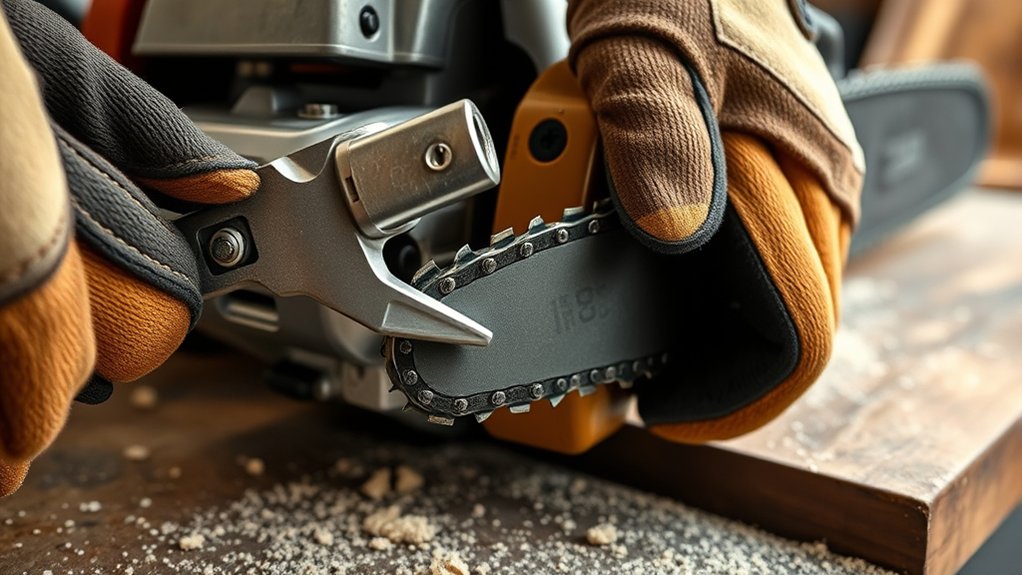
Locate the guide bar nuts on the side of the chainsaw, which secure the guide bar firmly in place. Using a scrench tool, carefully loosen the guide bar nuts by turning them counterclockwise.
Loosen them just enough so the guide bar can move freely without completely removing the nuts. Keep a firm grip on the chainsaw during this process to avoid unintended movement that could affect the chain’s position.
Once the guide bar nuts are loosened, you’ll be able to loosen the chain around the guide bar, preparing it for tension adjustment.
After completing your adjustments, remember to tighten the guide bar nuts securely to maintain proper chain alignment and safety.
This will keep everything in place and help you avoid any accidents. It’s a simple step but really important!
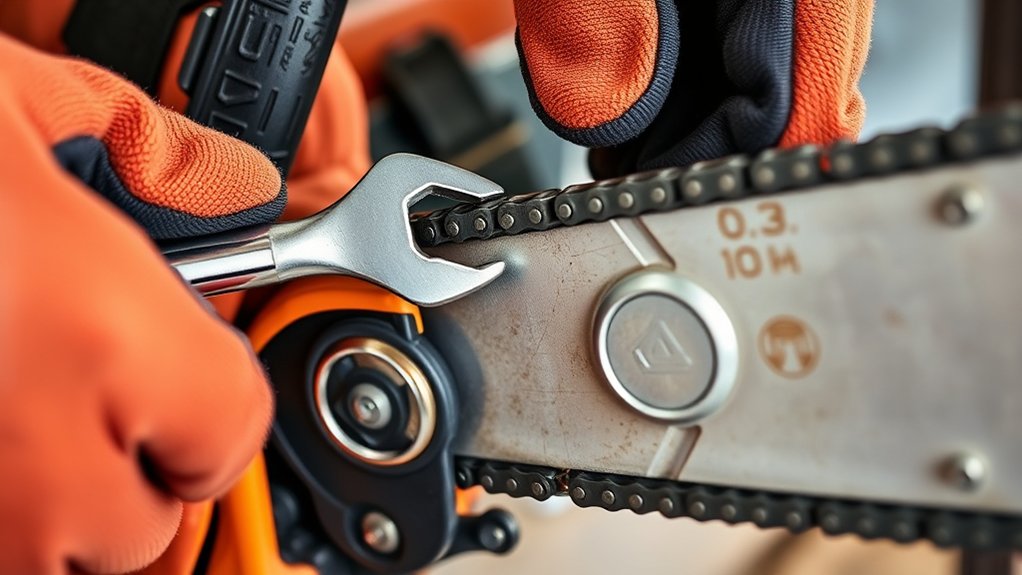
Step 2: Adjust The Chain Tension Screw
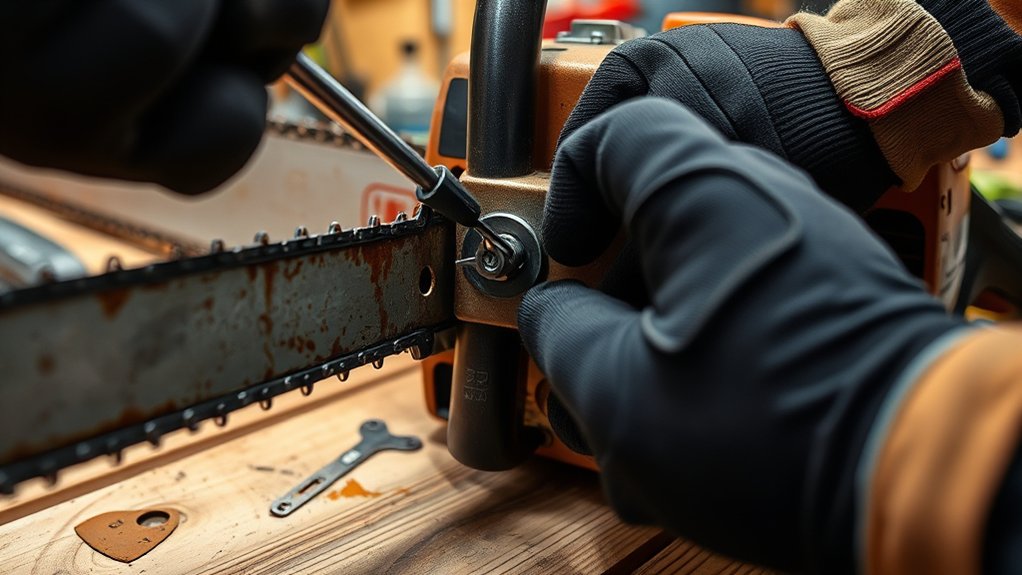
Locate the chain tension screw on the side cover or near the back of the guide bar to begin adjusting the chain tension.
Using a scrench or the appropriate tool, you’ll perform tension adjustment by turning this screw. To tighten the chain, turn the chain tension screw clockwise; to loosen, turn it counterclockwise.
Follow these steps precisely:
- Position your tool on the chain tension screw.
- Turn clockwise gently to tighten the chain, monitoring the chain’s snug fit against the guide bar.
- Stop tightening once the chain feels snug but still moves freely along the bar.
Proper tension adjustment guarantees safer operation and prevents premature wear.
Proper chain tension ensures safer use and helps avoid unnecessary damage and wear over time.
Avoid overtightening to maintain peak chain performance. Just take it slow and steady to keep everything running smoothly.
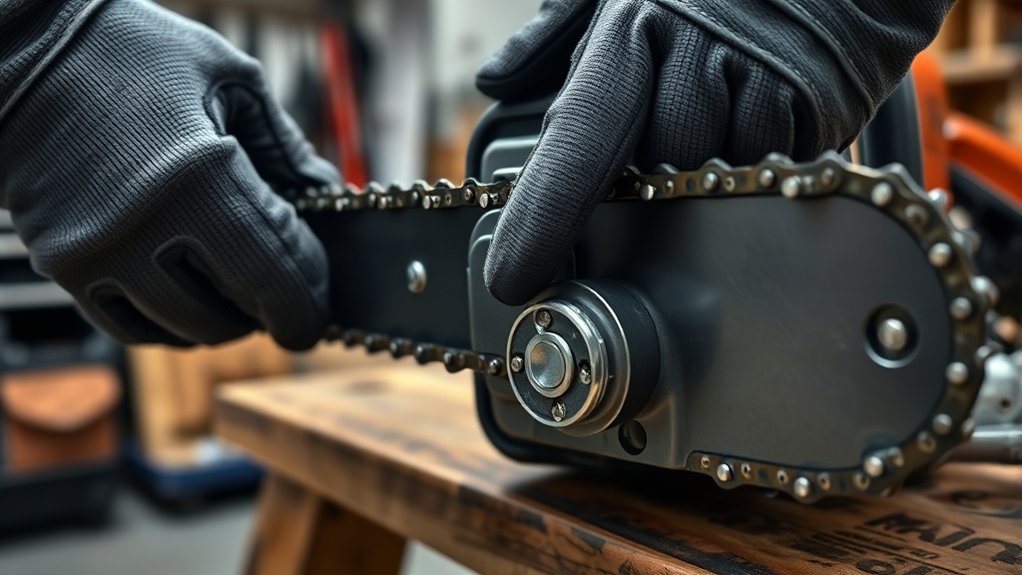
Step 3: Lift Bar Nose While Tightening Chainsaw Chain Nuts
Lift the nose of the guide bar while tightening the chainsaw chain nuts to confirm the chain seats properly against the bar. When you lift the bar nose, it guarantees the chain remains snug without over-tightening, which can cause damage or breakage.
Keep steady upward pressure on the bar as you tighten the nuts to achieve ideal tension and prevent the chain from derailing. This method also lets you visually confirm that the chain fits securely yet moves freely around the bar.
Properly tightened nuts with the bar nose elevated promote smooth operation and enhance cutting performance.
How To Perform The Snap Test To Confirm Proper Tension
Performing the snap test is a critical step to confirm your chainsaw chain has the correct tension. This test guarantees the tension of the chain is neither too loose nor too tight, optimizing safety and performance.
To perform the snap test, pull the chain away from the chainsaw guide bar until you feel slight resistance. Then, release the chain and observe if it snaps back firmly against the guide bar without slack.
Next, confirm the gap between the chain and guide bar is minimal, guaranteeing the drive links remain engaged. If the chain fails to snap back properly, it’s too loose and needs tightening.
Regularly performing the snap test keeps your chainsaw operating efficiently and prevents potential accidents.
How To Maintain Chain Tension During Use
Although chain tension may seem stable at the start, you should regularly check it during use, especially within the first half hour. This helps confirm the chain remains snug against the guide bar without excess slack.
Chainsaws chain tension naturally loosens as components heat and wear, so monitoring frequently prevents derailing and inefficient cutting. Always pause operation to adjust the tension when the chain is cool to avoid damage.
Use the snap test to verify proper tension: pull the chain down and release it; it should snap back smoothly.
Also, after cutting harder materials, check the chain tension again because increased resistance can change it.
Maintaining consistent chainsaws chain tension promotes safety, peak performance, and prolongs the lifespan of the chain and bar.
Frequently Asked Questions
How Often Should I Replace My Chainsaw Chain?
You should replace your chainsaw chain after 3 to 5 sharpenings or once you notice key replacement signs, like broken teeth or excessive stretching.
The typical chain lifespan lasts up to 100 cutting hours, but heavy use can shorten that.
It’s a good idea to follow maintenance tips such as regular sharpening and tension checks to help extend its life.
Always prioritize replacement if the chain shows damage or unsafe performance. That way, you guarantee efficient and safe operation.
Can I Use Any Oil for Lubricating the Chain?
Think of your chainsaw chain like a race car engine. It needs the right fuel to perform well. You can’t just use any oil; you need specific chain oil designed for high torque and heat.
Make sure to apply bar and chain oil regularly. Avoid using automotive or motor oils because they can cause wear. Proper oiling keeps your chain running smoothly and prevents overheating.
This also helps extend the life of your chain. When you use the right oil, you ensure safe and efficient cutting every time.
What Safety Gear Is Essential When Tightening the Chain?
You must wear safety gloves to protect your hands from sharp edges when adjusting chain tension. Protective eyewear is essential to shield your eyes from flying debris during the process.
These gear items minimize injury risks and guarantee precise handling.
Don’t skip sturdy, non-slip footwear and consider hearing protection in noisy environments. It’s all about staying safe and in control while you work.
Always prioritize safety gear every time you tighten the chain to prevent accidents and keep things running smoothly.
How Do I Know When the Chain Needs Sharpening?
If your chainsaw suddenly starts channeling its inner tortoise with sluggish cutting performance, it’s screaming for sharpening tools.
Look out for uneven chain wear or coarse, chunky wood shavings. That’s nature’s way of saying “help.”
Also, if smoke appears or cutting slows, your chain’s teeth probably dipped below their recommended height.
Grab your depth gauge, measure precisely, and sharpen.
Don’t let dullness wreck your workflow. Maintain sharpness for peak efficiency.
Can a Damaged Guide Bar Affect Chain Tension?
Yes, a damaged guide bar can definitely affect chain tension. When the guide bar bends, warps, or cracks, it disrupts tension maintenance and leads to uneven chain wear.
This can cause the chain to sit improperly, increasing the risk of derailment or inefficient cutting.
To keep the chain tension just right and help your chain last longer, it’s important to check your guide bar regularly.
If you notice any damage, don’t hesitate to replace it. This way, you ensure safe and consistent operation every time you use your tool.
Conclusion
Now that you know how to spot a loose chain, gather your tools, and follow each step carefully, you can tighten your chainsaw chain with confidence. Loosen the nuts, adjust the tension screw, lift the bar nose, and secure the nuts firmly.
Perform the snap test to confirm proper tension. Keep your chain tight, your cuts precise, and your work safe.
Stay sharp, stay efficient, and keep your chainsaw running smoothly every time.