Which Way Does A Chainsaw Chain Go – Correct Direction Guide
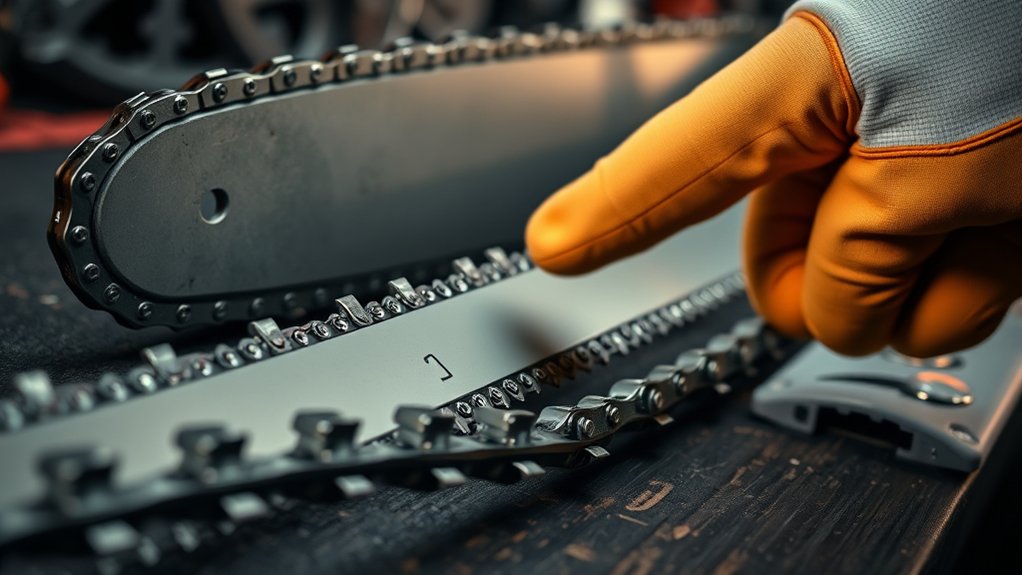
You must install your chainsaw chain with the cutting teeth facing away from the saw body, ensuring the chain moves counter-clockwise around the guide bar when viewed from above. Check the directional arrows on the side plates for confirmation. Proper chain direction guarantees safe, efficient cutting and prevents damage or kickback.
Incorrect installation leads to poor performance and increased wear. Understanding chain removal, alignment checks, and tensioning will further enhance your chainsaw’s safety and durability. It’s a good idea to get familiar with these steps to keep your saw working smoothly.
How To Identify The Correct Chainsaw Chain Direction
When installing your chainsaw chain, you need to verify the cutting teeth face away from the chainsaw’s body to maintain peak cutting performance. First, check the chain for directional arrows on the side plates; these indicate the correct direction.
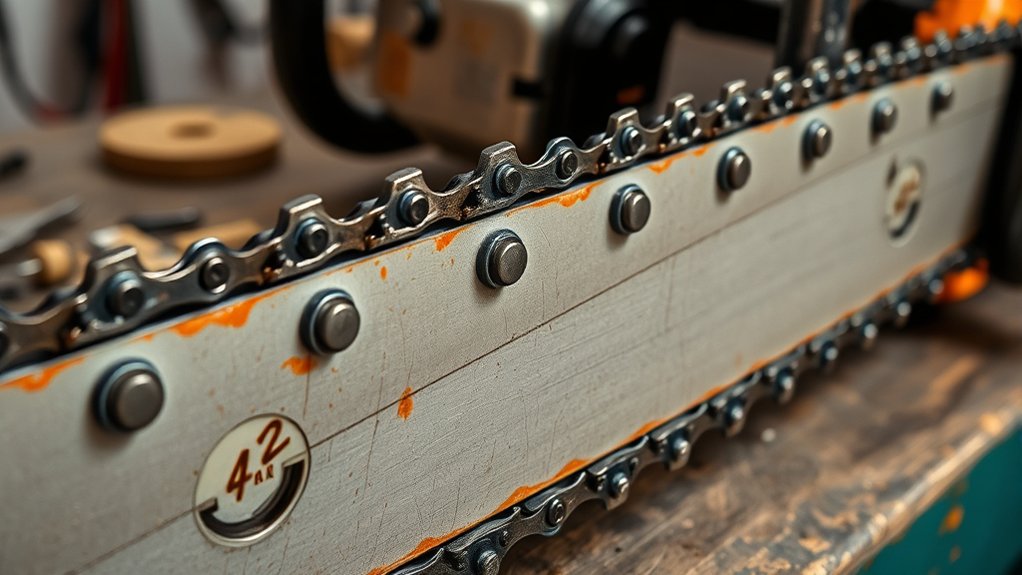
The chainsaw chain must fit snugly around the guide bar with drive links sitting flat in the bar groove.
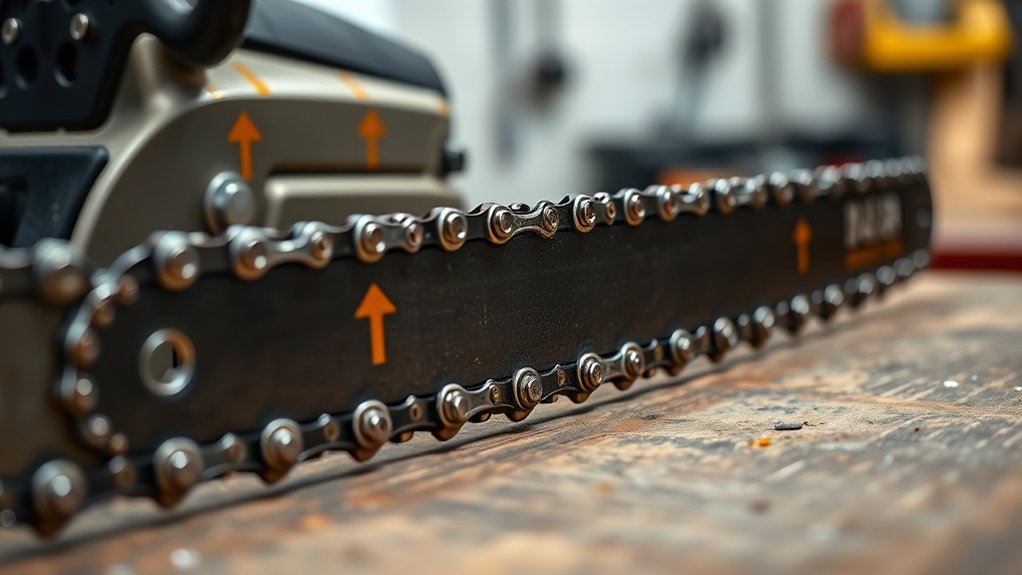
Rotate the chain by hand to confirm it moves counter-clockwise when viewed from the top. Make sure the chain is installed correctly before tightening the tension adjustment screw to avoid slack that could cause safety risks.
Incorrect installation compromises cutting efficiency, accelerates wear, and increases kickback hazards.
How To Remove The Chainsaw Chain Safely For Inspection
Before you start, make sure the chainsaw is powered off. Also, remove the battery or unplug it to be extra safe.
Don’t forget to engage the chain brake—that way, the chain won’t move accidentally while you’re working on it.
Once that’s done, go ahead and disengage the chain brake.
Then, turn the tensioning screw or wingnut counter-clockwise to loosen the chain tension. This step is really important because it helps you remove the chain from the guide bar safely, without causing any damage or injury.
Disengage Chain Brake
Disengage the chain brake to safely remove the chainsaw chain for inspection, making sure the tool is completely powered down and won’t move. Before you start, check your chainsaw manual to know the right way to remove the chain and what tools you’ll need. Always wear protective gear to keep yourself safe from sharp edges.
First, turn off the chainsaw and unplug it or take out the battery if it’s electric. For petrol models, switch off the engine and apply the chain brake.
Once the chainsaw is stable, carefully disengage the chain brake. Then, loosen the nuts that hold the guide bar, but don’t remove them completely.
Remove the chain gently and check it for any wear or damage before putting it back on.
Following these steps will help you handle the chain safely and inspect it properly.
Loosen Tension Mechanism
Locate the tensioning mechanism on your chainsaw and use the correct tool to loosen the chain tension. Before adjusting the tension, make sure the chainsaw is powered off and secured to follow essential safety practices.
Loosen the chain by turning the tension screw or knob, which varies by model, to reduce tension on the chain and guide bar. Properly adjusting the tension makes it easier and safer to remove and inspect the chain.
Once loosened, release the chain brake so you can carefully lift the chain off the sprocket and guide bar. Take a good look at the chain for any signs of wear or damage.
Keeping the chain properly lubricated and tensioned directly impacts how well your chainsaw cuts. Knowing the parts of your chainsaw and how they work is key to maintaining it well and getting the best performance.
How To Check Chainsaw Chain Parts For Proper Alignment
When checking your chainsaw chain for proper alignment, start by inspecting the drive links to confirm they sit flat within the guide bar groove. This guarantees stable tracking and prevents the chain from jumping or binding during use.
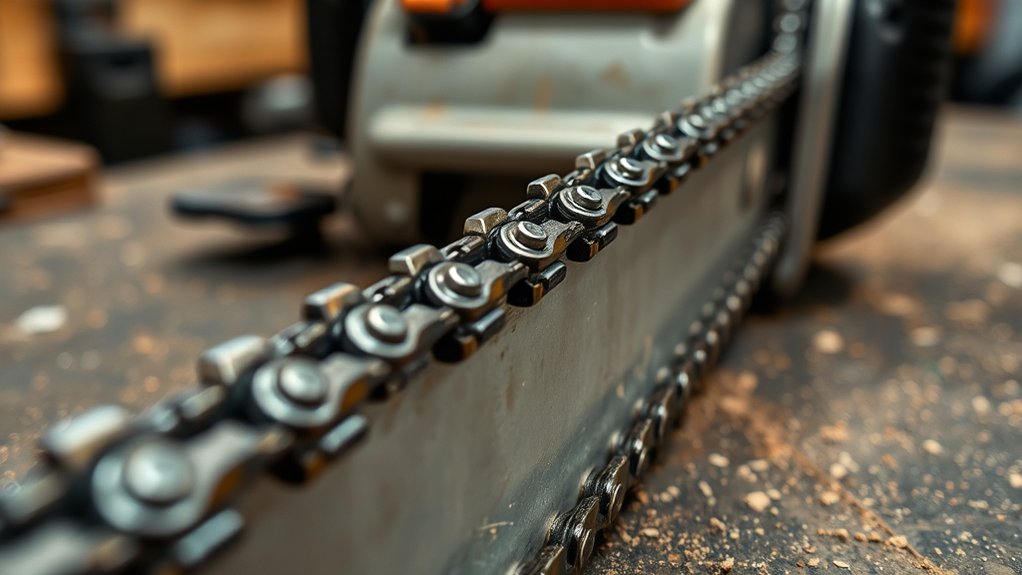
Next, pull the chain gently and check the orientation of the cutting edges. The teeth should be facing away from the chainsaw body to guarantee effective cutting.
Then, verify that the chain’s natural curve fits snugly around the guide bar. This confirms proper alignment.
After that, examine the side plates for directional arrows indicating the correct direction of rotation.
Finally, inspect the depth gauges to confirm they’re aligned correctly. This allows the cutting teeth to engage wood safely.
Following these steps guarantees the chain links are properly aligned. This is critical to ensure safety and maximum cutting performance.
How To Reinstall The Chainsaw Chain Correctly
Begin by positioning the chainsaw chain on the guide bar so that the cutting teeth face away from the chainsaw body, with their sharp edges oriented upward. Check for arrows on the chain’s side plates to confirm the correct direction.
Next, fit the drive links snugly into the bar groove, making sure the chain sits properly around the guide. Reattach the sprocket cover and perform chain tensioning according to the manufacturer’s specs.
Finally, verify that the chain moves smoothly in the correct direction before operation. This step is important to ensure safety and proper function.
| Step | Key Focus |
|---|---|
| Position Chain | Sharp edge should face away |
| Fit Drive Links | Secure in bar groove |
| Adjust Tension | Proper chain tensioning |
What Happens If The Chainsaw Chain Is Installed Backwards?
If you put the chainsaw chain on backwards, the cutting teeth end up facing the wrong way. This means the saw won’t cut efficiently and both the chain and the saw will wear out faster.
On top of that, having the chain installed backwards can cause kickback. The chain might break, and you could lose control of the saw. That’s a serious safety risk you definitely want to avoid.
Cutting Inefficiency And Damage
Although it might seem like a simple mistake, installing a chainsaw chain backwards severely compromises cutting efficiency and safety. When the chainsaw chain runs in the wrong direction, you face significant cutting inefficiency and potential damage.
Here’s what happens: blunt teeth contact cutting wood, causing smoke and ineffective cuts because the edges aren’t sharp. Excessive wear occurs on both the chain and guide bar, which means you’ll need replacements sooner.
Plus, improper lubrication leads to overheating, risking damage to the motor and other components.
You’ll also notice unusual vibrations and noise, which are signs that the chain isn’t oriented correctly and that there could be mechanical issues.
Always double-check that the chain runs in the right direction. This helps keep the chain sharp, reduces wear, and ensures efficient, safe cutting without putting you at serious risk.
Safety Risks And Hazards
Beyond cutting inefficiency and mechanical damage, installing a chainsaw chain backwards greatly elevates safety risks.
When the chainsaw’s chain is positioned the wrong way, the cutting teeth won’t engage wood properly. This causes increased kickback, which is a primary cause of serious injuries.
Improper installation can also lead to the chain jumping off the bar and excessive wear on both the bar and chain. If you don’t verify that the bar and chain face the correct direction, you risk damaging the cutting teeth rapidly. Plus, you compromise your control over the saw.
Studies show about 70% of chainsaw accidents result from improper usage, with incorrect chain orientation being a big contributor.
When And Why Should You Replace Your Chainsaw Chain?
When your chainsaw starts producing rough cuts or struggles to maintain a straight line, you should replace the chain promptly to preserve cutting efficiency and safety.
Regularly inspect for signs of wear on the chainsaw guide bar and chain, such as dull teeth or damaged drive links.
To help guarantee peak performance, follow these guidelines:
- Replace your chainsaw chain if you notice excessive friction, smoke, or if it jumps off the guide bar during actual cutting.
- Tighten the chain using the tensioning screw but avoid overtightening, which causes wear.
- Replace the chain approximately every 3-5 hours of heavy use or immediately upon performance issues.
- Consult a certified STIHL dealer for professional advice and replacement parts.
Prompt chain replacement sustains cutting precision and safety.
It’s really worth doing to keep your saw running smoothly and safely.
Choosing The Right Replacement Chainsaw Chain
| Specification | Importance |
|---|---|
| Pitch Measurement | Matches chain to chainsaw model |
| Gauge Specification | Secures snug fit on guide bar |
| Drive Link Count | Prevents installation and performance issues |
| Quality | Extends chain life, improves cutting |
Use basic maintenance tools to verify these factors before purchase. Accurate measurements and high-quality chains guarantee safe, efficient operation.
It’s really worth taking the time to check these details carefully. Doing so helps you avoid problems later on and keeps your chainsaw running smoothly.
Tips For Maintaining Your Chainsaw Chain For Longer Life
After selecting the correct replacement chain that fits your chainsaw’s specifications, maintaining it properly guarantees you get the best performance and longevity.
To keep the chain moving smoothly and safely, follow these tips:
Follow these simple tips to ensure your chainsaw chain runs smoothly and safely every time.
- Always check chain tension regularly. Proper tension prevents excessive wear and helps pull the drive links efficiently along the tip of the guide.
- Keep the cutting teeth sharp to maintain cutting efficiency and reduce kickback risks.
- Maintain adequate lubrication by topping up chain oil frequently. This minimizes friction and overheating.
- Inspect the chain for damage or wear, and replace your chainsaw chain promptly when you notice broken links or dull teeth.
Consistently applying these steps guarantees your chainsaw chain’s durability and peak operation over time.
Just stick with these simple habits, and your chain will stay in great shape longer!
Frequently Asked Questions
Can I Use Any Chainsaw Chain Brand With My Chainsaw?
You can’t just use any chainsaw chain brand with your saw; chain compatibility is essential. You must match brand specifications, chain size, pitch measurement, gauge thickness, and drive link count exactly.
Ignoring these can cause performance differences, increased wear, and safety risks.
Always check your chainsaw’s manual before purchase. Proper selection also affects replacement frequency and cutting efficiency.
This way, you ensure your saw operates reliably and safely every time.
How Often Should I Sharpen My Chainsaw Chain?
You should sharpen your chainsaw chain every 3 to 5 hours of use to keep cutting efficiency high and extend the chain’s life.
Using the right sharpening tools and techniques helps ensure the edges stay consistent, no matter what type of chain you have.
Keep in mind that how often you sharpen depends on the hardness of the material you’re cutting and the conditions you’re working in.
Regular maintenance not only improves performance but also makes your cutting safer by preventing rough cuts and the need for extra force.
Watch out for signs like smoking or the chain feeling dull.
When you notice these, sharpen your chain right away to keep things running smoothly and get the most out of your chain.
What Safety Gear Is Essential When Operating a Chainsaw?
You must wear safety goggles and a face shield to protect your eyes and face from debris. Hearing protection is essential to prevent noise-induced damage. Always use cut-resistant gloves and chainsaw chaps to guard your hands and legs against cuts.
Don hard hats in wooded areas to shield your head, and wear protective boots with steel toes for foot safety.
Keep a first aid kit nearby to address injuries promptly if they occur. It’s really about being prepared and staying safe while you work.
Can a Dull Chain Cause Chainsaw Engine Damage?
Yes, a dull chain can cause significant chainsaw engine damage. Poor chain maintenance reduces cutting efficiency, which puts extra strain on the engine and can lead to overheating.
When the engine works harder than it should, it speeds up bar wear and causes the overall performance to drop.
Also, if the chain isn’t properly lubricated, friction gets worse. This not only damages your saw but can also increase safety risks like kickback.
To keep your engine safe, make sure you sharpen the chain regularly and keep it well-lubricated.
Doing this will help maintain peak cutting performance and prevent unnecessary mechanical stress while you’re working. It’s a simple step that goes a long way in protecting your chainsaw.
How Do Weather Conditions Affect Chainsaw Chain Performance?
Don’t assume weather impacts only slow cutting; it affects every aspect of your chainsaw chain’s performance.
Moisture from rain or humidity promotes rust, which harms cutting efficiency.
Temperature matters too. Cold weather thickens chain lubrication, while heat causes the chain to expand, increasing the risk of derailment.
Wind combined with soil can introduce debris that disrupts smooth operation.
You’ll want to adjust chain tension and maintenance routines based on the season to keep your chainsaw cutting safely and at its best.
Conclusion
So, if you want your chainsaw to roar like a beast instead of whining like a kitten, get that chain on the right way. Teeth forward, cutting edge leading. Installing it backwards? Well, that’s asking for dull cuts, dangerous kickbacks, and a chainsaw that basically laughs at you.
Follow the steps, inspect, and maintain with precision. Because a chainsaw chain isn’t a puzzle. It’s a tool. Treat it like one, or prepare for a very bad day.