Can You Sand Engineered Wood: Safe Methods And Tips
You can sand engineered wood floors safely if you check the wear layer thickness first. Avoid sanding if it’s under 2mm, and only do light sanding if it’s 2-3mm.
Use a lightweight orbital sander with fine-grit sandpaper. Always sand with the grain and apply light pressure to avoid damage.
Make sure to protect your space from dust and wear proper safety gear. Follow proper techniques to keep your floors looking great. And remember, sometimes it’s best to call a pro to guarantee a flawless finish.
Key Takeaways
- Sand engineered wood only if the wear layer is at least 2mm thick to avoid damaging the veneer.
- Use a lightweight orbital sander with fine-grit (100-120) sandpaper, always sanding with the grain.
- Apply light pressure and make consistent, overlapping passes to ensure an even surface without gouges or scratches.
- Vacuum thoroughly and use a tack cloth after sanding to remove dust before staining or finishing.
- Wear a dust mask, eye protection, and contain dust with plastic sheeting for safe sanding conditions.
Can You Sand Your Engineered Wood Floor? Here’s How to Find Out
Wondering if you can sand your engineered wood floor? Start by inspecting the wear layer thickness. If it’s under 2mm, sanding isn’t recommended.
Between 2-3mm, you might manage one sanding, while 4-6mm thickness allows multiple sandings.
Next, inspect the floor for damage like deep gouges or delamination. These often require board replacement rather than sanding.
Check for deep gouges or delamination—these issues usually mean you need to replace boards instead of sanding.
Keep in mind, sanding engineered wood floors removes surface scratches and the protective finish, so you’ll need to refinish afterward.
Always review the original product specs to confirm sanding suitability.
If you decide to go ahead, clear the area, contain dust, and wear proper safety gear.
For thin wear layers or significant damage, professional sanding is your best bet to avoid costly mistakes and guarantee the floor’s longevity.
How Wear Layer Thickness Affects Sanding Options
Although engineered wood floors offer a durable and attractive option, the thickness of their wear layer directly determines how many times you can sand them. Engineered wood flooring typically has a wear layer between 1mm and 6mm.
If the wear layer is under 2mm, it’s best to avoid sanding to prevent damage to the thin veneer and exposure of the plywood core. A 2-3mm wear layer allows for one light sanding and refinish.
Meanwhile, 4-6mm can handle 2-3 sanding sessions safely.
Unlike solid wood flooring, engineered hardwood floors need careful consideration of wear layer thickness during sanding. Knowing this helps you plan refinishing and maintain your floors through safe sanding without risking structural damage.
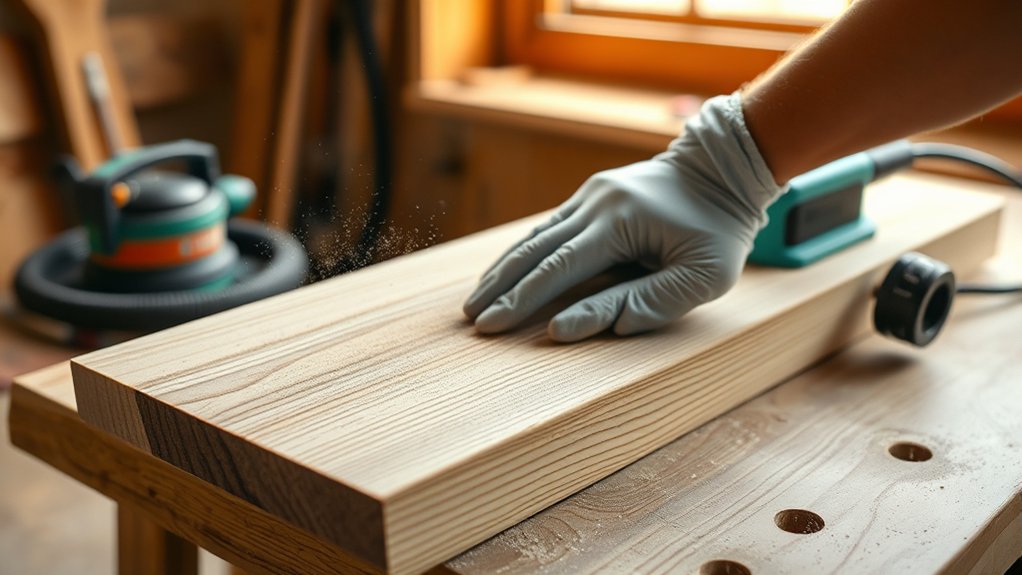
Essential Tools and Techniques for Safe Engineered Wood Floor Sanding

Use a lightweight orbital sander with fine grit sandpaper (100-120) to gently sand your engineered wood floor.
Always move with the grain to protect the veneer.
Before you start, make sure you’ve removed all furniture and debris from the area.
It’s also a good idea to contain dust with plastic sheeting to keep your home clean.
Following these proper sanding techniques will help you avoid damaging the floor and get it ready for a smooth finish.
Recommended Sanding Equipment
A lightweight orbital or random orbital sander fitted with 100-120 grit sandpaper works best for engineered wood floors, as it reduces the risk of damaging the thin veneer layer.
To sand engineered flooring safely, choose a sander with fine grit to avoid aggressive abrasion.
For screening and recoating, consider a floor buffer with a fine-grit screening pad instead of heavy sanding.
Always wear safety gear, including a dust mask and eye protection, to guard against dust particles.
When sanding, make consistent, overlapping passes following the grain to guarantee an even surface.
After sanding, vacuum thoroughly to remove dust, then wipe with a tack cloth before finishing.
Using the right equipment helps preserve your engineered wood’s appearance and durability while maintaining a safe work environment.
It’s all about working smart and keeping your floors looking great!
Proper Sanding Techniques
Mastering three key sanding techniques will help you protect your engineered wood floor’s delicate veneer while achieving a smooth, even finish. First, always check the wear layer thickness; sanding is only safe for layers 2mm or thicker. Use a lightweight orbital sander with fine grit sandpaper (100-120) and sand gently with the grain.
Keep your sanding consistent by overlapping your strokes and applying light pressure. This helps avoid uneven spots and damage. After sanding, vacuum thoroughly to remove all dust before applying any finish.
If you want, you can also consider the screen and recoat method to refresh the surface without sanding through the veneer. It’s a great alternative that’s less invasive and still effective.
| Technique | Purpose |
|---|---|
| Wear Layer Assessment | Determines sanding feasibility |
| Fine Grit Sandpaper | Guarantees gentle, effective sanding |
| Vacuum & Dust Removal | Prepares surface for finish |
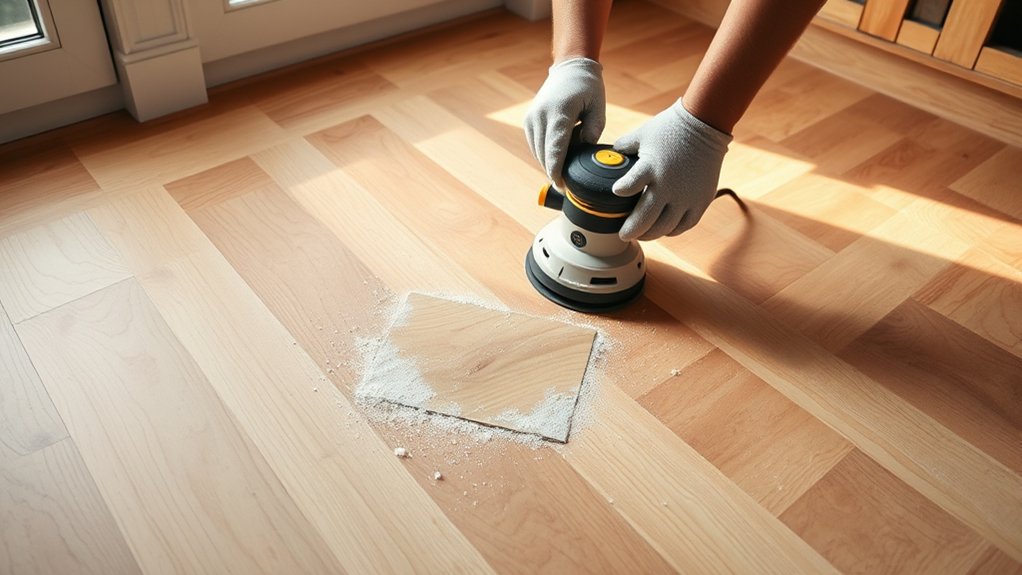
Step-by-Step Sanding Guide for Engineered Wood Floors
First, clear out all your furniture and give the floor a good cleaning to make sure the workspace is dust-free.
Then, grab a lightweight orbital sander fitted with fine-grit sandpaper.
Remember to always sand along the grain—that way, you won’t damage the wood.
Just take your time with each step, and you’ll end up with a smooth, even finish on your engineered wood floors.
Preparing Floors Properly
Before sanding engineered wood floors, check the veneer thickness carefully. If it’s under 2mm, avoid sanding to prevent damage and opt for screening and recoating instead.
Start by removing all furniture and thoroughly cleaning the floor to guarantee a clean surface for sanding. Inspect the floor for protruding nails or staples. Countersink them and fill small holes to protect your equipment.
Use a lightweight orbital sander with fine grit (100-120) to gently remove the old finish. Always sand with the grain to preserve the wear layer thickness. This careful preparation prevents over-sanding and damage to the veneer.
After sanding, vacuum and wipe the floor with a tack cloth. Properly preparing floors guarantees a smooth refinish and extends your engineered wood floor’s life.
Sanding Techniques Explained
Though sanding engineered wood floors requires care, following a clear, step-by-step approach will help you achieve a smooth, even finish without damaging the veneer. First, confirm the wear layer thickness is suitable for sanding. Use fine grit sandpaper (100-120) attached to a lightweight orbital sander, moving with the grain and making overlapping passes for a uniform finish.
After sanding, vacuum the area thoroughly and wipe with a tack cloth to remove dust. When sanding and refinishing, apply thin coats of finish, allowing each to dry fully. Do light sanding between coats to enhance adhesion and preserve the natural beauty of the wood.
| Step | Tool/Material | Result |
|---|---|---|
| Check wear layer | Measuring gauge | Avoids damage |
| Sand gently | Orbital sander & fine grit | Uniform finish |
| Finish application | Thin coats & light sanding | Long-lasting beauty |
How to Apply Stain and Finish on Engineered Wood Floors
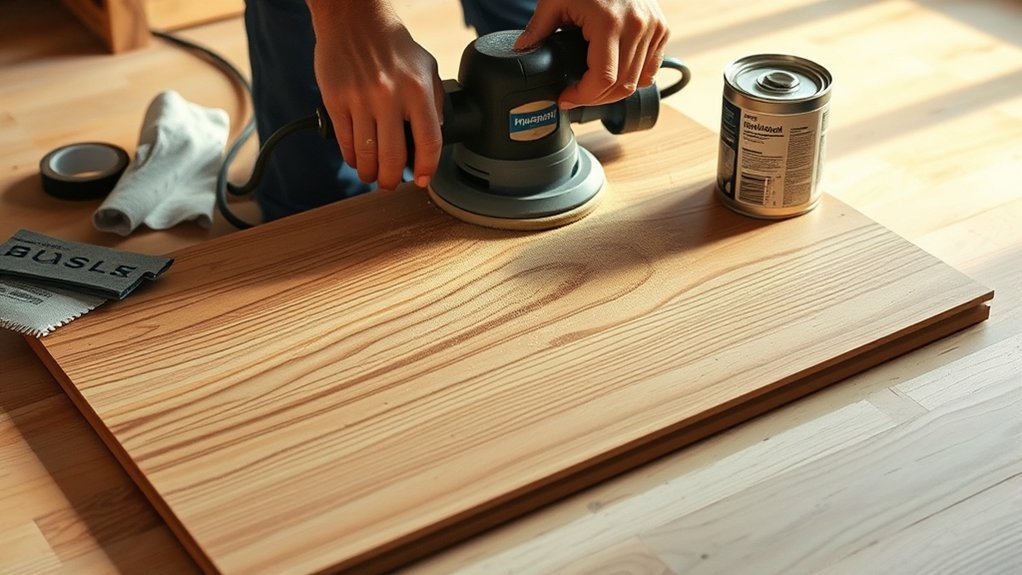
Test the stain on a small, inconspicuous area of your engineered wood floor to see how it absorbs color, since it can react differently than solid wood.
Before you apply stain, sand your floors lightly with fine-grit sandpaper to guarantee proper adhesion. Use a high-quality wood stain, applying it in manageable sections and working with the grain.
Maintain a wet edge to avoid lap marks.
Once the stain dries completely, seal and protect your engineered floors with a finish suitable for lacquered floors or polyurethane. Apply thin, even coats of finish without rushing.
Sand lightly between wear layers with 220 or 320 grit sandpaper for a smooth surface.
Always follow manufacturer instructions for drying and curing to achieve a durable, professional finish. This way, your floors will look great and last longer.
Common Refinishing Risks and How to Avoid Them
When refinishing engineered wood floors, understanding the risks involved can save you from costly mistakes and damage.
Sandpaper is essential, but you must first assess the wear layer thickness. If it’s under 2mm, sanding risks exposing the plywood core, causing irreparable damage.
Avoid improper sanding techniques like applying too much pressure or using the wrong grit. Always use a sanding block and sand with the grain of the wood to prevent scratches and uneven surfaces.
Dustless sanding or sealing the area with plastic sheeting helps control dust.
Keep a margin for error in mind to protect the floor’s integrity.
- Check wear layer thickness before sanding
- Use proper sanding tools and follow the grain
- Contain dust to protect your home and lungs
These common refinishing risks are easy to avoid with care.
When It’s Time to Call a Pro for Refinishing Engineered Wood Floors
If your engineered wood floor has a wear layer thinner than 2mm, you should avoid sanding it yourself to prevent damage. In this case, professional refinishing is the safest option to refinish engineered hardwood properly.
Deep scratches, delamination, or structural issues require expert assessment. DIY sanding can actually make these problems worse. So, it’s better to call in a pro when you see these kinds of issues.
For floors with a wear layer thickness between 2 and 3mm, calling a pro is still a smart move. They can figure out if light sanding is possible and use advanced techniques for an even finish.
Professionals have the right tools and experience to handle engineered wood flooring gently. They also ensure a dust-free process and help prevent any damage.
When you’re unsure or dealing with significant wear, trusting a specialist is the best way to get a lasting, high-quality finish.
Tips for Maintaining Your Engineered Wood Floor After Refinishing
Although refinishing brings your engineered wood floor back to life, maintaining its appearance and durability requires careful attention afterward.
The wear layer thickness of your hardwood floor plays a vital role in how often you’ll need to refinish, so protect it by avoiding walking on the floor for 24 to 72 hours after refinishing.
To keep minor surface damage at bay, use felt pads under furniture and clean the floor regularly with a suitable floor cleaner, avoiding harsh chemicals.
Schedule periodic assessments to monitor the finish’s condition and plan maintenance accordingly.
Avoid walking on the floor until the finish cures to preserve the wear layer thickness.
Use felt pads under furniture to prevent scratches and minor surface damage.
Clean the floor with a gentle floor cleaner, steering clear of harsh chemicals.
Frequently Asked Questions
Can Engineered Wood Floors Be Sanded Multiple Times?
You can sand engineered wood floors multiple times depending on the sanding depth and wear layer thickness. Floors with thicker engineered wood layers allow for more refinishing options, while thinner layers limit sanding techniques to avoid damage.
To maximize the longevity of finishes, follow maintenance tips and weigh cost considerations between DIY and professional sanding. Proper care keeps your floors looking great without compromising the wood’s integrity or lifespan.
So, it really comes down to how thick that top layer is and how careful you’re with sanding.
Taking good care of your floors means you can enjoy them for years without needing major work.
How Long Does the Sanding and Refinishing Process Take?
The sanding and refinishing process usually takes 3 to 7 days.
You’ll spend 1 to 2 days on sanding techniques and surface preparation, using proper refinishing tools and dust control methods.
Drying times between finish applications add another 1 to 2 days.
Consider cost factors when choosing professional vs DIY.
Afterward, follow maintenance tips to prolong your floor’s life.
Patience guarantees a durable, beautiful finish without rushing.
Taking your time really pays off in the end!
What Types of Finishes Are Best for Engineered Wood Floors?
You know what they say, “Don’t put all your eggs in one basket.”
For engineered wood floors, water-based polyurethane is a top finish type because it offers great durability, quick drying, and low VOCs.
Hardwax oil suits you if you want natural color options and easy maintenance tips.
Consider sheen levels and application methods carefully.
Compare costs too.
Oil-based polyurethane is pricier but durable, while acrylic-urethane blends resist scratches, fitting modern design trends and repair techniques.
Is Sanding Engineered Wood Environmentally Friendly?
Yes, sanding engineered wood can be environmentally friendly if you follow eco-friendly practices.
You should manage waste effectively and use chemical alternatives with low VOCs to reduce emissions. Consider recycling options for leftover materials to support sustainability concerns.
Also, keep in mind the lifespan impact. Sanding extends the floor’s life, which lowers energy consumption and reduces the need for new materials.
Always check environmental regulations and source engineered wood from responsibly managed forests to get the best results.
Can Sanding Remove All Types of Stains From Engineered Wood?
You can’t remove all stains by sanding since only wear layers over 2mm thick allow effective stain removal techniques.
Deep stains often need plank replacement despite sanding equipment options. Staining vs. sanding depends on engineered wood durability and finish type.
For the best engineered wood maintenance, test small areas first or consider professional sanding services.
Follow DIY sanding tips carefully to protect the engineered wood lifespan. Also, use stain prevention methods to avoid damage.
Conclusion
Sanding your engineered wood floor can breathe new life into it, but only if you know the wear layer thickness and use the right tools. Are you confident in your skills and equipment to avoid damaging the floor? If not, it’s smarter to call a pro.
Remember, proper sanding, staining, and finishing will extend your floor’s beauty. Keep up regular maintenance afterward to protect your investment and enjoy your refreshed space for years to come.