Can You Sand Veneer Wood: Best Techniques Without Damaging Surface
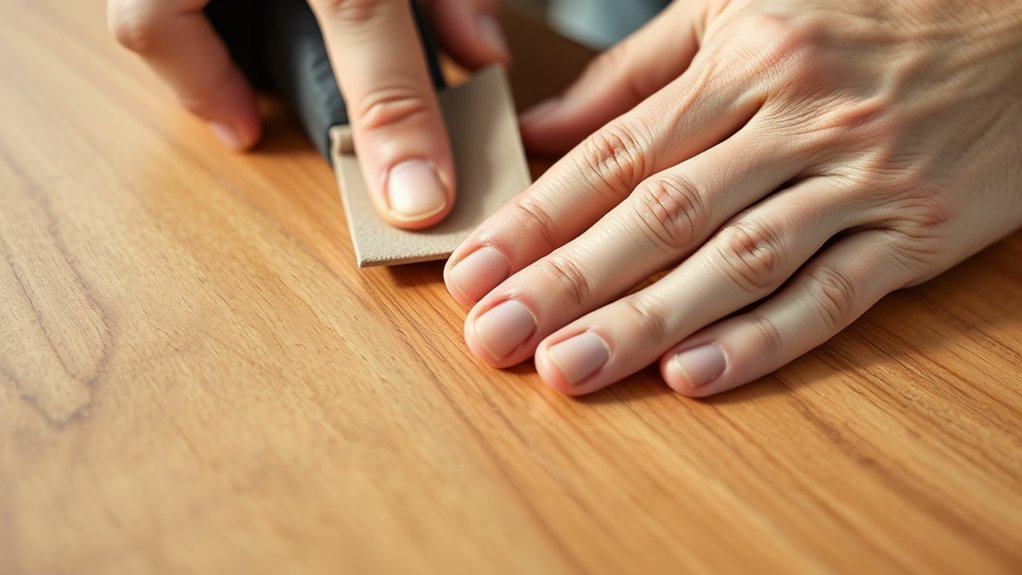
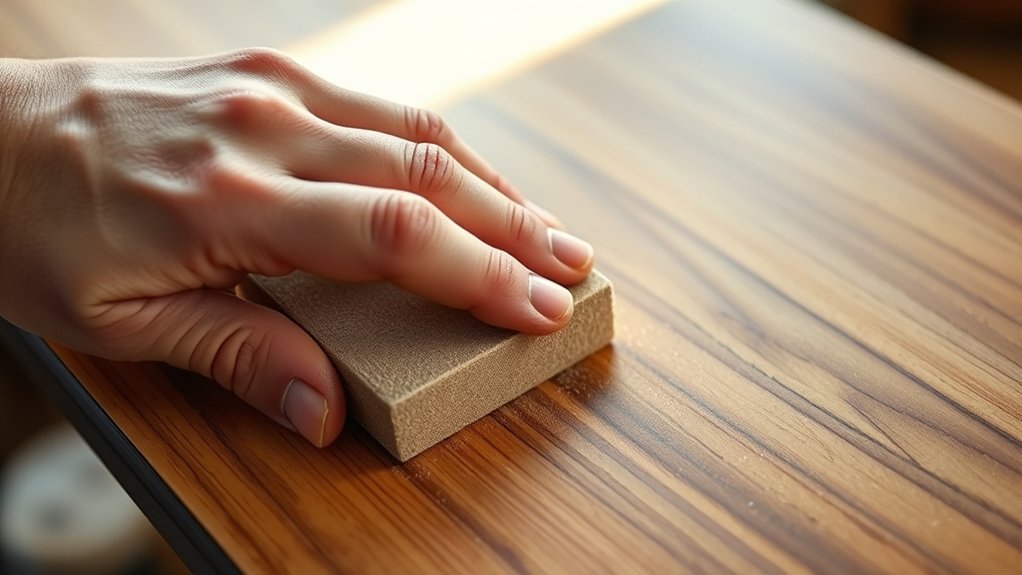
You can sand veneer wood safely by using fine-grit sandpaper starting at 150-grit and progressing to 220-grit. Always sand gently with light, even pressure. Make sure to sand along the wood grain to prevent scratches.
Avoid using power tools that apply uneven pressure. Instead, use a sanding block or a random orbital sander with a light touch for better control. Keep wiping away dust frequently to see your progress clearly.
Taking these careful steps helps maintain the veneer’s delicate surface. There’s actually a lot more to mastering the process effectively, but this is a great place to start.
Identifying Wood Veneer Surfaces
How can you confidently identify wood veneer surfaces before sanding? Start by examining the edges for lamination lines.
These lines reveal the thin veneer layer, usually between .024” and .039” thick, bonded over a thicker substrate.
The thin veneer layer, typically .024” to .039” thick, is firmly bonded over a thicker base.
These lines help you distinguish veneer from solid wood and guide your sanding techniques.
Next, inspect the surface for any damage like air bubbles, lifted corners, or peeling.
These are signs that require gentle handling to avoid further harm.
Pay close attention to the grain pattern, as it varies with wood species and helps confirm the veneer type.
Understanding these details guarantees you adjust your sanding techniques appropriately.
This way, you prevent over-sanding that could compromise the veneer’s delicate structure and preserve the wood’s visual integrity throughout your project.
Why Sanding Veneer Requires Extra Care
You need to handle veneer sanding with extra care because it’s very thin and can easily get damaged. If you sand too much, you might actually cut right through the veneer, which would expose the layer underneath and ruin the whole surface.
Veneer Thickness Sensitivity
Because veneer wood is typically only between .024” and .039” thick, sanding it demands exceptional care to avoid damaging the surface. This delicate veneer leaves little margin for error, so you must use fine-grit sandpaper and apply light, consistent pressure.
When sanding veneer, always move in the direction of the wood grain to maintain the surface’s integrity.
Using a sanding block helps distribute your pressure evenly, preventing gouges or uneven sanding.
Remember, over-sanding can quickly compromise the veneer’s appearance and structure, so progress gradually through grit levels.
Treat the veneer as a fragile layer rather than solid wood, and you’ll preserve its beauty while refining the surface effectively.
Risk Of Sand-Through
Although veneer wood offers a beautiful, thin surface layer, sanding it demands extra care to avoid sanding through. Veneer thickness typically ranges from .024” to .039”, making it highly susceptible to damage during the sanding process.
If you sand too aggressively, you risk removing the veneer entirely or creating depressions. This exposes the substrate and compromises the piece’s integrity. Sand-through causes irreversible damage that’s costly to repair or replace.
To prevent this, you must monitor the sanding process closely and use proper sanding techniques. Starting with higher grit sandpaper and progressing gradually helps maintain the veneer’s texture and appearance.
Proper sanding minimizes blotchy finishes and uneven surfaces. This way, you preserve the wood’s natural beauty while protecting this delicate layer from sand-through.
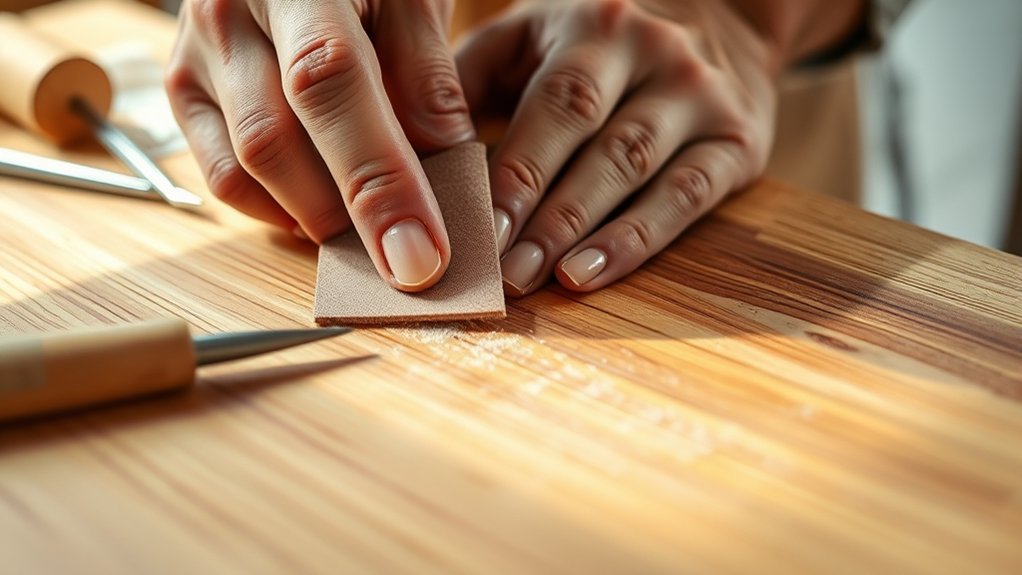
Gentle Sanding Techniques
Handle veneer wood with a delicate touch during sanding to preserve its thin surface layer, typically ranging from .024” to .039” in thickness. When sanding wood veneer, apply light, even pressure to avoid sanding through the surface. Always sand in the direction of the grain to prevent visible scratches that can ruin the finish.
Start with 150-grit sandpaper, then move to 220-grit for a smooth surface. Regularly wipe with a tack cloth to remove dust buildup that could cause unevenness. This way, your veneer stays intact and looks great.
| Technique | Reason |
|---|---|
| Even pressure | Prevents sanding through veneer |
| Sand with grain | Avoids visible scratches |
| Gradual grit steps | Maintains veneer integrity |
Choosing the Right Sandpaper Grit for Veneer
You’ll want to start sanding veneer with 150-grit sandpaper. This helps smooth out any imperfections without causing damage.
After that, move on to 180-grit—it’s great for removing finer scratches and prepping the surface for finishing.
Finally, finish up with 220-grit to get a smooth, polished look that really brings out the veneer’s natural grain.
Sandpaper Grit Progression
Three key sandpaper grits, 150, 180, and 220, form the ideal progression for sanding veneer wood effectively.
When working with veneer, you need to carefully follow this sandpaper grit progression to avoid sanding through the thin surface layer.
Start with 150-grit sandpaper to smooth initial imperfections without damaging the veneer.
Then, move to 180-grit to get rid of finer scratches left by the coarser grit.
Finish with 220-grit for a silky-smooth surface that’s ready for stain or finish.
Always sand along the wood grain and clean the surface between grits.
This helps prevent visible scratches and guarantees an even finish.
Following this sequence helps you maintain veneer integrity while achieving a flawless finish.
It’s a simple process, but sticking to it really makes a difference.
Starting Grit Recommendations
Following the proper sandpaper grit progression sets the foundation, but selecting the right starting grit guarantees you don’t damage the delicate veneer surface. For veneer sanding, begin with 150-grit sandpaper. It’s coarse enough to address initial imperfections without penetrating too deeply and harming the thin wood layer.
Using grits lower than 150 risks sanding through the veneer, so avoid them. After 150-grit, you’ll move to finer grits, but for now, focus on this safe starting point. Remember to sand strictly with the grain to prevent scratches.
These starting grit recommendations assure you maintain veneer integrity while effectively smoothing. If you’re working with specialized veneer products like FormWood, consult a sales representative to confirm compatible sanding grits and avoid surface damage.
Final Sanding Grit
Although starting with 150-grit sandpaper sets a solid foundation, choosing the right final sanding grit is essential to achieve a smooth veneer surface ready for finishing. The final sanding grit guarantees your veneer is perfectly prepared without damage.
Let the sandpaper do the work by following these steps:
- Begin with 150-grit to address major imperfections safely.
- Move to 180-grit to remove finer scratches and smooth the surface.
- Finish with 220-grit for a refined texture, ideal for stain or finish application.
- Always sand in the grain’s direction to avoid scratches and preserve appearance.
It’s a good idea to consult your supplier about the last sanding grit used on your veneer. That way, you can optimize your results and avoid over-sanding.
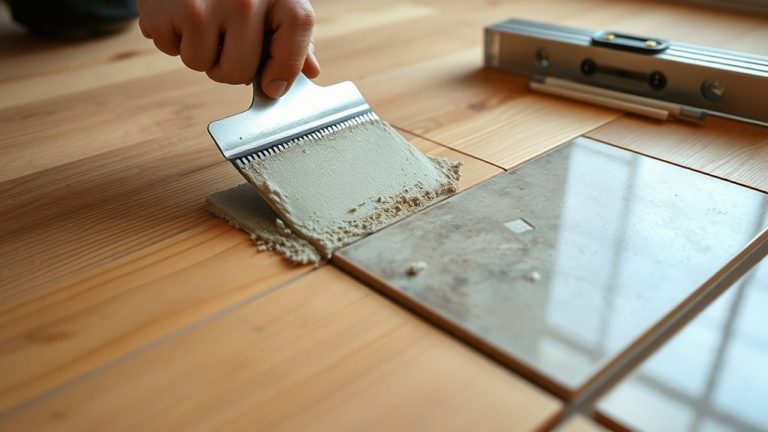
Best Tools for Sanding Veneer Wood
The best tools for sanding veneer wood combine control and delicacy to prevent damaging the thin surface layer. Using the right tools is essential: a sanding block is vital for applying even pressure and maintaining control. This helps avoid uneven surfaces and damage.
Effective veneer sanding requires tools that offer precision and gentle control to protect the delicate surface.
Start sanding with 150-grit sandpaper, then move to 180-grit and finish with 220-grit to gently refine the surface. For larger areas, a random orbital sander can be used, but only with a light touch and after activating it to prevent gouging.
Avoid quarter-sheet or half-sheet sanders, as their uneven pressure can harm the veneer. Always sand in the direction of the grain to create a smoother finish.
And remember to clean the surface between grits to keep dust from interfering with your work.
Step-by-Step Guide to Sanding Veneer Safely
Sanding veneer safely involves a careful, step-by-step approach to preserve its delicate surface. To avoid sanding through the veneer, follow these steps:
Start with 150-grit sandpaper for hand sanding to gently smooth the surface without removing too much material. Use a sanding block and sand in the wood grain direction to maintain even pressure and prevent scratches.
Progress to 180-grit, then finish with 220-grit sandpaper to refine and polish the surface. Keep your sanding tool moving constantly to avoid depressions, and clean dust regularly with a tack cloth.
Monitor the veneer closely and stop once it feels smooth. This method minimizes risks and guarantees the veneer stays intact without damage.
Just take your time, and you’ll get great results!
Common Sanding Mistakes and How to Avoid Them
When you rush or use improper techniques, you risk damaging your veneer beyond repair. Avoid the over-sanding risk by sanding gently and never starting with grit below 150. Always sand with the wood grain to prevent visible scratches and maintain a smooth surface.
Use a sanding block instead of power tools to control pressure evenly. Don’t overlook dust management; clean between sanding stages with a tack cloth to avoid uneven finishes.
| Mistake | Consequence | How to Avoid |
|---|---|---|
| Over-sanding risk | Veneer sand-through | Sand gently, start at 150-grit |
| Ignoring sanding direction | Visible scratches | Always sand with the wood grain |
| Neglecting dust removal | Uneven finish | Use a tack cloth frequently |
Repair Options If You Sand Through Veneer
Even with careful sanding, you might accidentally sand through the veneer, creating visible damage. When this happens, act promptly to restore your veneer products without sanding across the grain further.
Here are four precise repair options:
Discover four precise repair options to seamlessly restore and conceal veneer damage with ease.
- Use a steady hand to lightly shade over-sanded areas with a pencil, blending imperfections into the wood grain.
- Re-sand the damaged zones gently with finer-grit sandpaper (100-grit) to even out texture without thinning veneer.
- Apply the stencil method, using tape and a stencil to incorporate flaws into a decorative pattern.
- Employ the geometry method by integrating geometric shapes over the sanded spots to distract from damage.
Each technique helps maintain the veneer’s integrity while minimizing visible flaws. These tips should help you fix those little mistakes without much hassle.
Frequently Asked Questions
Can Sanding Veneer Improve Its Stain Absorption?
Yes, sanding veneer can improve its stain absorption when done carefully.
You’ll want to follow veneer maintenance tips like using fine-grit sandpaper and sanding with the grain to avoid damage.
If sanding feels risky, you might want to explore alternatives such as deglossing agents.
These can help prepare the surface without the hassle of sanding.
Combine these with proper stain application techniques, like applying thin, even coats.
This helps the stain penetrate uniformly and gives your veneer a smooth, professional finish without compromising its surface.
How Often Can Veneer Be Sanded Before Replacement Is Needed?
Think of veneer like a delicate layer of skin. You can only peel back so many times before it’s gone.
You can sand veneer about two to three times, but always keep veneer thickness in mind by removing just .005” to .010” per session.
Use gentle sanding techniques to avoid damage.
When wear becomes visible despite careful sanding, explore veneer repair options. Or consider replacement to preserve your piece’s beauty and integrity.
Is It Safe to Use Power Sanders on Veneer Surfaces?
Yes, you can use power sanders on veneer surfaces, but you need to choose the right sander types carefully.
Random orbital sanders work best because they apply even pressure. This helps protect the veneer thickness from damage.
Avoid quarter-sheet or half-sheet sanders since they can cause uneven sanding.
Always keep the sander moving with light pressure to protect the surface. This way, you prevent gouges or sanding through the delicate veneer layer.
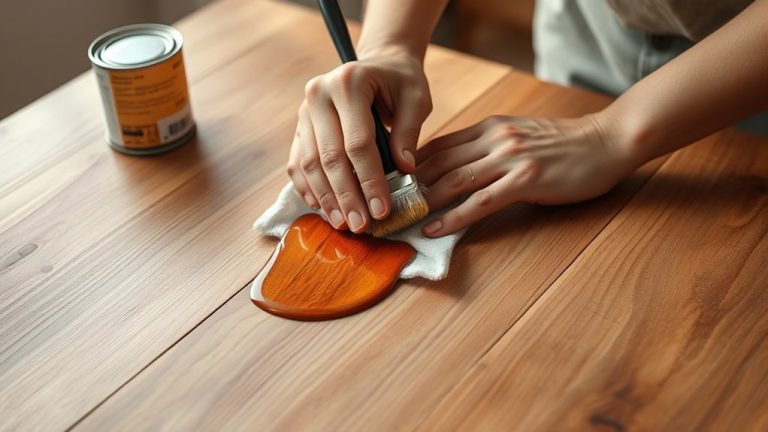
What Finishes Work Best After Sanding Veneer Wood?
You might think any finish works after sanding veneer, but choosing the right one is essential for veneer maintenance.
Gel stains offer consistent color and hide imperfections, while spar varnish provides waterproofing and UV protection, perfect for varied environments. Oil finishes enhance grain without changing color, ideal for a natural look.
Apply multiple thin coats for durability, and always test finishes on a small area after sanding techniques to guarantee compatibility and avoid damage.
It’s a simple step that can save you from ruining the whole piece. Taking a little extra time here really pays off in the long run.
Can Sanding Veneer Remove Water Stains Effectively?
Yes, sanding can effectively aid water stain removal on veneer if you use careful sanding techniques.
Start with 150-grit sandpaper and move to finer grits like 220 to avoid damaging the thin veneer layer. Always sand with the grain, and test on a hidden spot first.
Remember, regular wiping with a tack cloth is essential.
Follow these veneer care tips to restore your surface without harming it. It’s all about being gentle and patient with the process.
Conclusion
Sanding veneer wood demands a gentle touch, kind of like walking on eggshells. By choosing the right grit, using proper tools, and following careful steps, you can refresh your veneer without causing damage.
Just be sure to avoid common pitfalls like sanding too aggressively. And always have some repair options ready, just in case.
With a little patience and precision, you’ll preserve the beauty of your veneer surface. That way, it looks flawless for years to come.