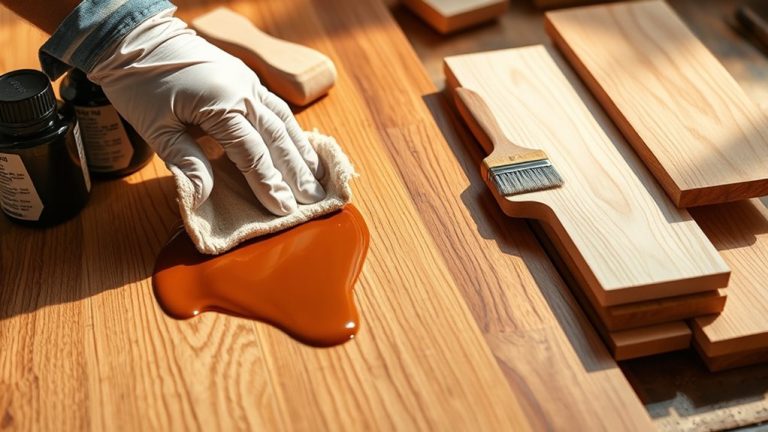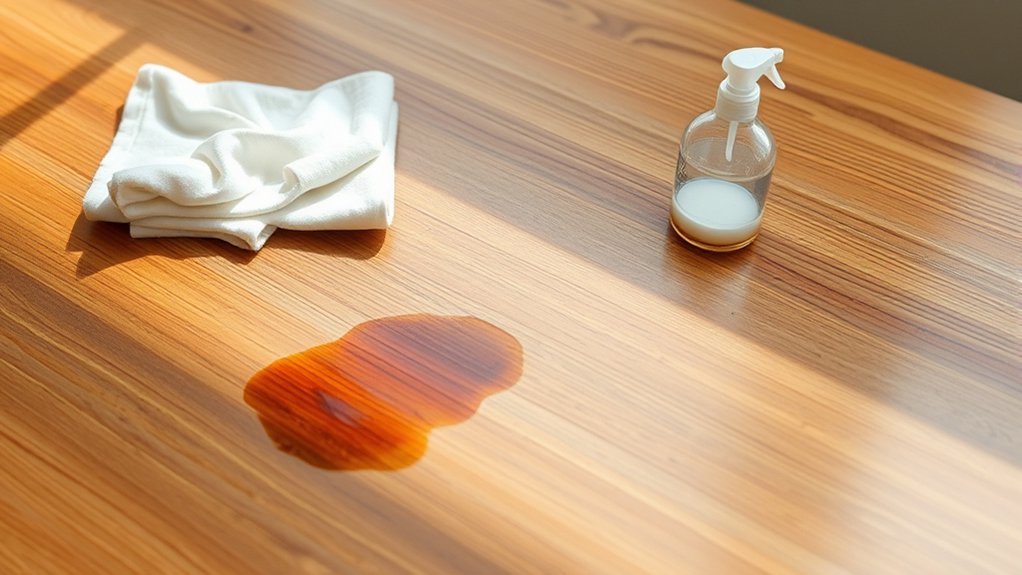
Can You Remove Stain From Wood: Effective Methods Guide
You can remove stains from wood by first identifying the stain type and wood condition to choose the right method. For moisture stains, apply gentle heat with a cloth and low-heat iron. Use a baking soda paste for light stains and a vinegar-olive oil mix for water rings.
Tough dark stains require oxalic acid or careful sanding with progressively finer grit. Proper preparation and conditioning improve results. Explore these techniques further to master stain removal and refinishing. Give them a try, and your wood surfaces will look great again!
How to Identify Different Types of Wood Stains
How can you quickly recognize the type of wood stain you’re dealing with? Start by evaluating the stain’s appearance and location.
Surface-level stains usually appear as white or cloudy marks, indicating moisture trapped within the finish. In contrast, deeper stains cause darker discoloration by penetrating the wood fibers.
Next, determine whether the stain is film-forming or non-film-forming. Film-forming stains create a surface layer, making them harder to remove, while non-film-forming stains penetrate the wood and are easier to clean.
Consider the types of wood involved and whether the surface is sealed, unfinished, or lightly oiled, as this affects your approach to removing wood stain effectively.
Also, check if the wood is reclaimed, as unique finishes may require specialized methods.
Stay Safe When Removing Wood Stains: Essential Tips
Because chemical strippers and solvent-based removers can pose health and safety risks, you need to take proper precautions before starting wood stain removal.
Always wear protective gloves and goggles to shield your skin and eyes from harmful chemicals. It’s also important to work in a well-ventilated area to avoid inhaling toxic fumes.
Before applying any product broadly, test the chemical remover on a small, hidden section of the wood. This way, you can make sure it won’t cause damage.
Keep these essential safety tips in mind:
- Wear protective gloves and eye protection at all times.
- Make sure your workspace is well-ventilated to disperse fumes.
- Test any chemical remover on an inconspicuous area first.
- Use a drop cloth to protect surrounding surfaces from spills.
Following these guidelines helps reduce risks and makes stain removal safer for you.
Remove Moisture Stains Using Gentle Heat
When moisture gets trapped beneath a wood finish, it often leaves white rings or cloudy marks that you can remove using gentle heat.
To do this, place a clean cloth made of cotton over the moisture stains. Use a low-heat iron or a hair dryer set to medium heat and apply it briefly onto the cloth.
Move the heat source in short intervals, frequently lifting the cloth to check if the stain is fading. Avoid high heat settings to prevent damaging the wood or finish.
This method works best on sealed surfaces where moisture hasn’t deeply penetrated the wood fibers.
After heating, let the wood cool completely before checking the stain removal. This way, you get accurate results without causing further harm.
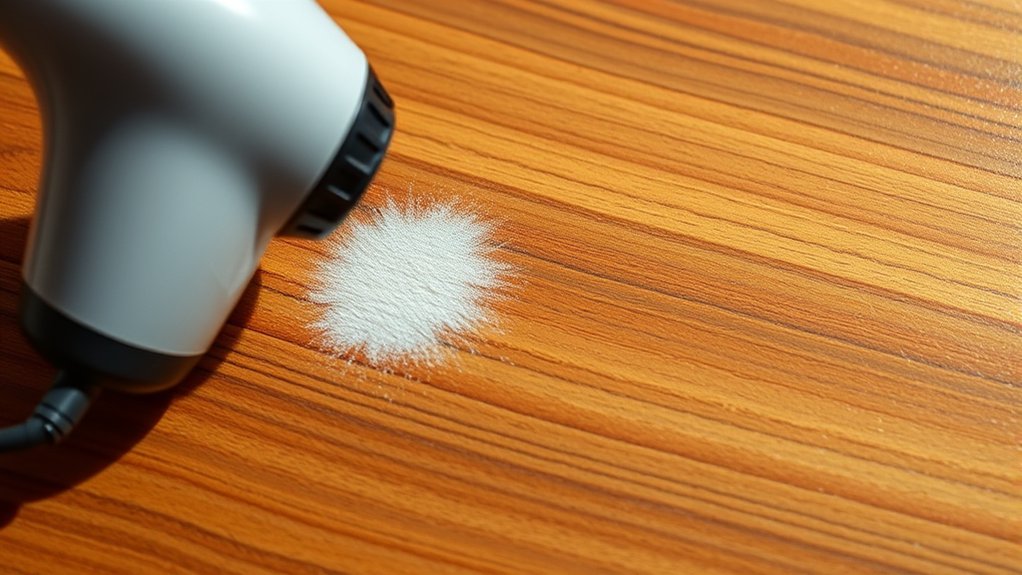
Use Baking Soda Paste for Light Wood Stains
Start by mixing baking soda with just enough water to make a thick paste.
Then, apply the paste gently using a soft cloth, rubbing along the wood grain. This helps lift the stain without harming the surface.
Once you’re done, wipe away any leftover residue with a damp cloth, and make sure to dry the wood thoroughly to keep it protected.
Baking Soda Preparation
One effective way to tackle light wood stains is by using a baking soda paste. Baking soda acts as a mild abrasive that helps remove stain residues from the wood surface without causing damage.
To prepare the paste, follow these steps precisely:
Mix equal parts baking soda and water until you get a thick, spreadable consistency. Make sure the paste is neither too runny nor too dry for ideal application.
Use a soft cloth to apply the paste gently, working along the grain of the wood.
After treatment, wipe off the baking soda residue with a damp cloth and dry the surface thoroughly.
This preparation confirms the baking soda paste is effective in treating light stains while preserving the wood’s integrity. It’s a simple and safe way to refresh your wood surfaces without any harsh chemicals.
Application Techniques
Apply the baking soda paste directly to the stained wood using a soft cloth.
Make sure you rub gently in circular motions along the grain to prevent surface damage. This technique uses baking soda’s mild abrasive properties to remove light stains without scratching.
After applying, keep rubbing the paste gently for a few minutes to lift the stain effectively.
Then, remove the residue with a damp cloth, wiping the wood surface thoroughly to avoid moisture absorption.
Finally, dry the area completely to prevent water damage.
Using a soft cloth throughout is essential to protect the wood’s finish.
This method works best on fresh, light stains. For older or deeper stains, you might want to consider stronger removal techniques.
Consistent, careful application will give you the best stain removal while keeping the wood intact.
Just take your time and be gentle!
Treat Water Rings and Faint Marks With Vinegar and Oil

Mix equal parts white vinegar and olive oil to create a solution that effectively breaks down water rings and faint marks on wood.
This mixture targets moisture trapped in the wood fibers, helping to lift water stains while conditioning the surface.
To apply, pour the vinegar and oil solution into a bowl for easy access.
Use a soft cloth to rub the mixture into the stained area, moving in circular motions along the wood grain.
Let it sit for several minutes to penetrate the water ring.
Then wipe off excess with a clean cloth to reveal a nourished, even finish.
This method not only diminishes water marks but also nourishes and protects the wood.
It really helps preserve its natural beauty.
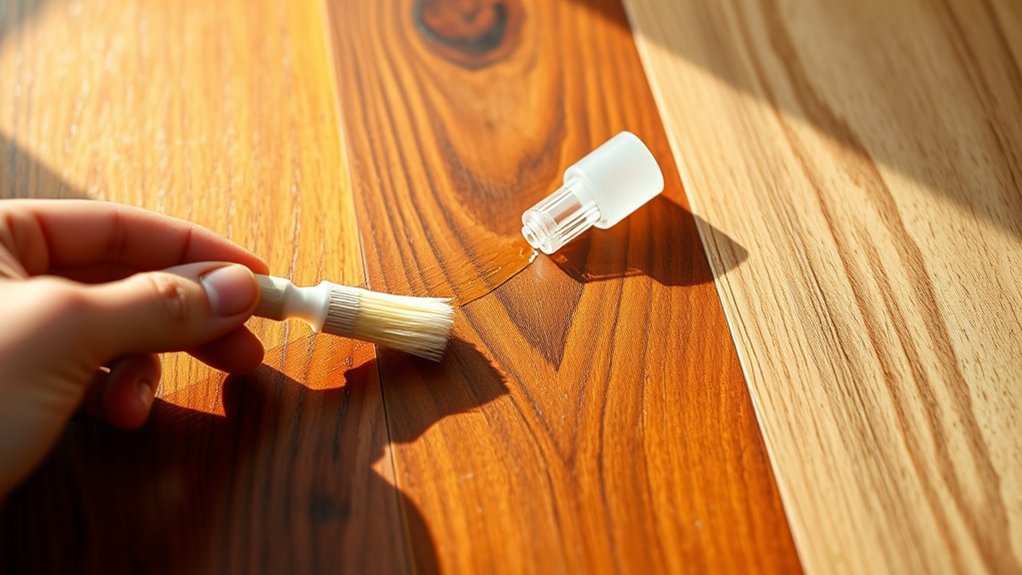
How to Use Oxalic Acid for Tough Dark Wood Stains
When water rings and faint marks resist vinegar and oil treatment, oxalic acid offers a powerful solution for tough dark stains embedded deep within wood fibers.
Begin by dissolving oxalic acid crystals in warm water, following the manufacturer’s recommended ratio, usually one part acid to four parts water. Apply the solution evenly to the stained wood using a brush or cloth.
Dissolve oxalic acid crystals in warm water, then apply evenly to stained wood with a brush or cloth.
Let it sit for 10 to 20 minutes to break down the discoloration. After that, rinse the area thoroughly.
Then, perform light sanding to remove any residual discolored fibers and to prepare the surface for refinishing.
Always wear protective gloves and make sure there’s proper ventilation when handling oxalic acid. It can be hazardous if inhaled or ingested.
This method effectively targets tough dark wood stains without damaging the wood structure.
When and How to Sand Wood to Remove Stubborn Stains
Although chemical treatments like oxalic acid can address many stains, sanding becomes necessary when those stubborn marks penetrate deeply into the wood. You’ll mechanically abrade the surface to expose clean wood beneath.
To effectively sand out stubborn stains, follow these steps: Start with 80 grit sandpaper to remove the bulk of the stain. Then, progressively switch to 120 grit, and finish with 180 or 240 grit for a smooth surface.
Always sand in the direction of the wood grain to avoid surface damage.
After sanding, thoroughly clean and dry the wood to remove dust and debris before proceeding. This way, you’ll get the best results without harming the wood.
Prepare and Refinish Wood After Removing Stains
After sanding away stubborn stains, you need to clean the wood surface thoroughly to remove any dust or residue that could affect refinishing.
Use mineral spirits or a damp cloth to clean the surface, then let it dry completely for 24 to 48 hours.
Next, sand the wood lightly with progressively finer grits, starting at 120 and finishing at 240. This will create a smooth surface that promotes adhesion.
Before you apply a new stain or finish, test it on a hidden area to confirm color and compatibility.
For softwoods, applying a wood conditioner before staining helps achieve even absorption and prevents blotchiness.
Frequently Asked Questions
Can Wood Stains Be Removed Without Stripping the Finish?
Yes, you can remove wood stains without stripping the finish by using natural wood treatments like a baking soda paste or a vinegar and olive oil solution.
Apply these cleaning techniques carefully to lift surface stains while preserving the finish.
It’s a good idea to incorporate stain prevention tips, such as promptly wiping spills and using protective coatings, to minimize future damage.
Always test treatments on a small area first to make sure the finish stays intact.
What Tools Are Best for Removing Stains From Carved Wood?
Wondering which tools best suit stain removal techniques on carved wood? You should use fine twisted steel wool for delicate crevices, combined with small detail scrapers to carefully lift stains without harming the design.
Soft brushes help remove dust and residue gently, while damp cloths assist in softening stains without saturating the wood.
For larger areas, electric drill attachments with soft brush heads can speed up carved wood maintenance, but handle them cautiously to preserve wood integrity.
It’s all about being gentle and precise to keep the beauty of the carving intact. Just take your time and use the right tools for each part of the job.
How Long Does It Take for Wood Stain Removers to Work?
Wood stain removers typically work within 15 to 30 minutes, depending on the stain removal techniques and product type.
You should prepare the surface thoroughly before application to guarantee even penetration.
Drying time factors like temperature and humidity directly affect effectiveness. So, it’s best to apply removers in small sections and avoid disturbing the area while it works.
Be sure to follow the manufacturer’s instructions closely, because overexposure can damage the wood.
If you’re dealing with stubborn stains, you might need to apply the remover multiple times for the best results.
Can Stain Removal Damage Antique Wood Furniture?
Yes, stain removal can damage antique wood furniture if not done carefully. Studies show over 40% of restoration errors harm finishes. So, it’s really important to be gentle with these pieces.
To avoid damage, use antique preservation techniques like gentle cleaning and light sanding instead of harsh chemicals.
Also, try stain prevention methods and wood care tips like testing removers on hidden spots first.
When in doubt, always consult professionals. This helps maintain your piece’s value and historic integrity while safely removing stains.
Taking your time and being cautious goes a long way!
Are There Eco-Friendly Alternatives to Chemical Wood Strippers?
Yes, you can use eco-friendly alternatives like vinegar solutions, which break down finishes safely.
Combine natural oils, such as olive oil with vinegar, to create gentle cleaning agents that protect wood fibers. Baking soda serves as a mild abrasive, helping lift stains without harsh chemicals.
These methods maintain wood integrity while effectively removing stains, making them ideal for sensitive or antique wood surfaces.
Just be sure to apply carefully and test on a small area first. This way, you’ll avoid any surprises and keep your wood looking great.
Conclusion
Removing stains from wood is manageable with the right approach. Did you know that over 70% of wood damage comes from untreated stains? By identifying the stain type and choosing methods like gentle heat, baking soda paste, or oxalic acid, you can effectively restore your wood’s appearance.
Remember, sanding is a last resort. After stain removal, always prepare and refinish the surface to protect and prolong your wood’s life. Follow these steps carefully for best results.