Can I Paint Treated Wood: When And How To Do It Properly
You can paint treated wood, but you need to wait 3 to 6 months for it to dry to a moisture level of 12-15% or less. Check this by seeing if water absorbs quickly or using a moisture meter.
Clean the surface gently, let it dry, then lightly sand. Use a high-quality exterior latex primer and 100% acrylic latex paint. Apply two thin coats for durability.
If you want your project to last, understanding the full process is key. Taking the time to do these steps right really makes a difference.
Can You Paint Pressure Treated Wood?
When can you paint pressure treated wood? You can paint pressure treated wood, but only after its high moisture content decreases. You need to wait 3 to 6 months for the wood to dry properly.
To check readiness, perform a water test by sprinkling water on the surface. If the water beads, the wood is too wet. If it absorbs quickly, you’re good to go.
Start by applying an exterior latex primer specifically designed for pressure treated wood to guarantee proper adhesion.
Then, apply 2-3 thin coats of high-quality 100% acrylic latex paint, allowing each coat to dry fully before the next.
Regular maintenance and touch-ups are essential to keep your painted wood in good condition and extend its lifespan.
Waiting to Paint Pressure Treated Wood
You’ll want to wait about 3 to 6 months for pressure treated wood to dry out before painting it.
To make sure it’s ready, you can check the moisture content with a meter.
If you don’t have one, try sprinkling a little water on the surface. If the water beads up instead of soaking in, the wood isn’t quite ready yet.
Ideally, you’re aiming for a moisture level of 12-15% or lower—that way, your paint will stick properly and last longer.
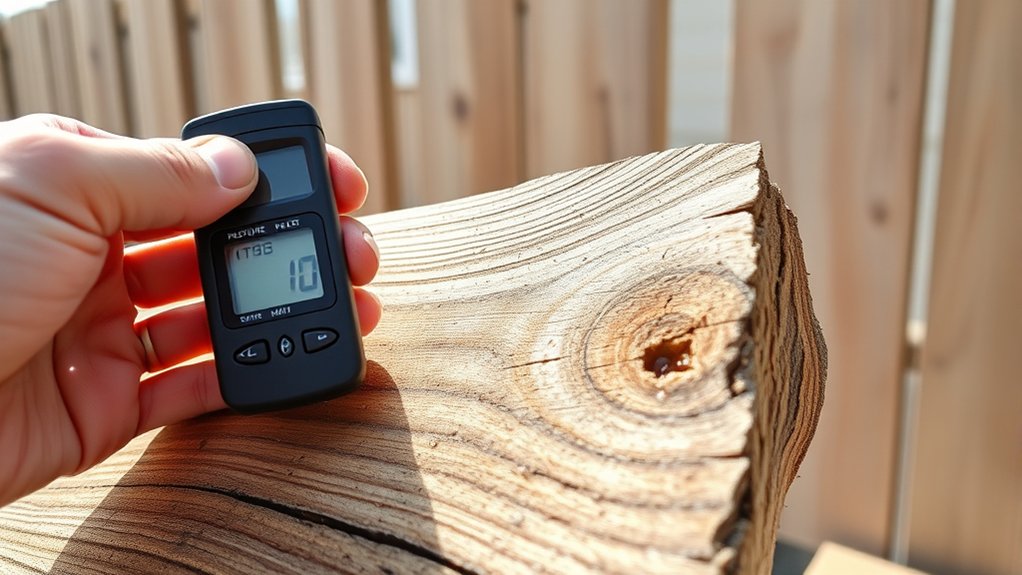
Moisture Content Testing
How can you tell if pressure treated wood is ready to be painted? The key is checking moisture content. Before you paint, the wood’s moisture level must be below 14% to guarantee proper adhesion and avoid peeling.
A quick water test helps: sprinkle water on the wood surface. If it beads up, the wood is still too wet to paint. For accuracy, use a moisture meter to measure the exact moisture content. This tool confirms when the wood is truly ready to paint.
Keep in mind, drying time varies based on climate, wood thickness, and humidity.
Ideal Drying Time
Properly drying pressure treated wood before painting is key to achieving a durable finish. The ideal drying time usually ranges from 3 to 6 months. This depends on factors like wood thickness, climate, and humidity.
To test if the wood is ready, sprinkle water on the surface. If it beads, the wood’s moisture content is too high, which can cause poor paint adhesion.
Use a moisture meter to confirm the wood’s moisture content is at or below 12%. This ensures the moisture levels are suitable for paint application. Taking the time to dry the wood properly helps prevent peeling and makes the finish last longer.
| Factor Affecting Drying Time | Impact on Drying Process |
|---|---|
| Wood Thickness | Thicker wood takes longer |
| Climate | Humid climates slow drying |
| Humidity | High humidity increases time |
How to Tell When Pressure Treated Wood Is Ready to Paint
Although it can take anywhere from a few weeks to six months for pressure treated wood to dry completely, knowing when it’s ready to paint is essential for a lasting finish.
Pressure treated wood can take weeks to months to dry, so timing your paint job is key for durability.
You can perform a simple water test by sprinkling water on the wood surface. If it beads up, the wood isn’t ready. If it absorbs quickly, it likely is.
For ideal painting conditions, aim for a moisture content of 12-15% or lower. You can check this with a digital moisture meter. Proper drying guarantees the paint adheres well and prevents peeling.
Throughout the drying process, store the wood correctly to avoid warping or damage that could affect the finish.
Cleaning and Preparing Pressure Treated Wood for Painting
Before you start painting, it’s important to give the pressure treated wood a good cleaning.
Grab a stiff brush and some mild detergent to scrub away any dirt and mildew. It’s best to skip pressure washing because it can damage the wood’s treatment.
Once you’ve cleaned it, just let the wood dry completely—this usually takes about 24 to 48 hours.
After it’s dry, take some sandpaper and lightly sand any rough spots. This will help create a smooth surface that’s ready for paint.
Cleaning Methods Overview
To get your pressure treated wood ready for painting, start by thoroughly cleaning it to remove dirt, mildew, and other contaminants. Use a mild detergent with a stiff-bristled brush to clean the surface gently, avoiding pressure washing because it can damage the wood’s chemical treatment.
After scrubbing, rinse the wood well with a garden hose to remove all soap residue.
Once cleaned, allow the wood to dry completely for 24-48 hours. Moisture on the surface can prevent proper paint adhesion and cause peeling later. To check if the wood is dry enough, perform a water bead test. If water beads up, the surface still holds moisture and needs more drying time.
Making sure your pressure treated wood is clean and dry is really important for getting long-lasting paint results.
Surface Preparation Tips
Three key steps will set you up for a successful paint job on pressure treated wood: ensuring the wood is fully dry, thoroughly cleaning the surface, and applying the right primer.
First, wait 3 to 6 months for the wood to dry completely. Use the water bead test to check. If water beads, it’s too wet to paint.
Next, clean the wood using a stiff brush and mild detergent to remove dirt and mildew that can hinder paint adhesion.
Let the wood dry for 24 to 48 hours after cleaning.
Finally, apply a high-quality exterior latex primer designed for pressure treated wood to improve adhesion and durability.
Once primed, use multiple thin coats of high-quality exterior paint. Make sure each coat dries fully before applying the next.
Choosing Primer and Paint for Pressure Treated Wood
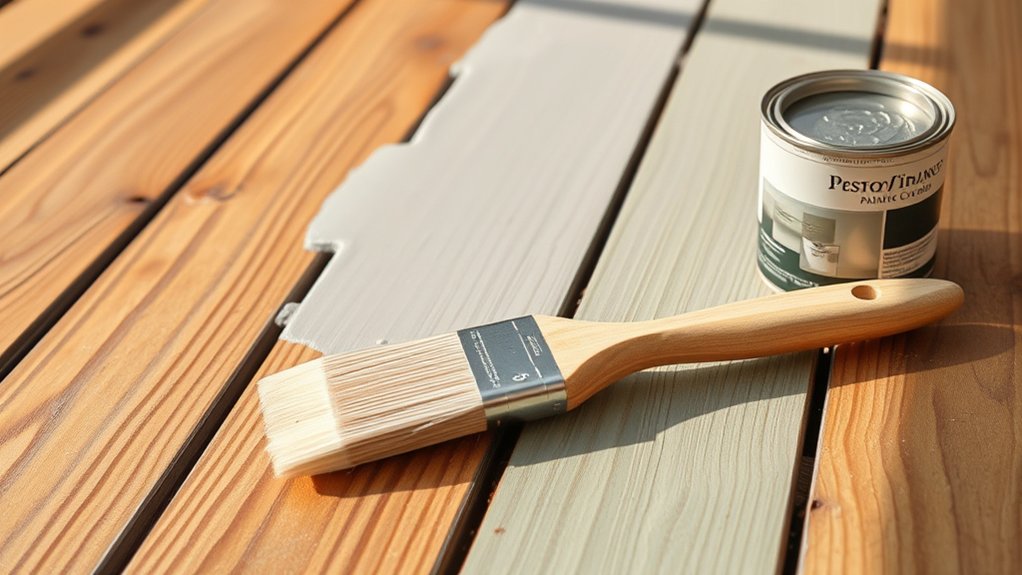
When painting pressure treated wood, selecting the right primer and paint is essential for a lasting finish. Always use a high-quality exterior latex primer designed specifically for pressure treated wood to guarantee proper adhesion and prevent peeling caused by moisture.
Using a quality exterior latex primer ensures strong adhesion and prevents moisture-related peeling on pressure treated wood.
Choose a primer that’s white for light colors or tinted for darker shades to achieve ideal coverage.
For paint, opt for 100% acrylic latex paint, which offers the flexibility and durability needed for surfaces exposed to foot traffic. Avoid oil-based paints, as they tend to become rigid and crack over time on treated wood.
To get the best results, apply two thin coats of paint, letting the first dry completely before adding the second. This approach helps the paint properly adhere and extends the lifespan of your finish.
Step-by-Step Guide to Painting Pressure Treated Wood
Although painting pressure treated wood might seem straightforward, you’ll need to follow specific steps to ensure a durable and attractive finish. First, wait for the wood to dry completely. This usually takes 3 to 6 months and can be confirmed with a moisture test.
Next, clean the surface thoroughly to remove dirt and chemicals. This helps the paint stick better. Then, apply a high-quality primer that’s suitable for pressure treated wood.
After priming, pick the right paint. Exterior latex paint works great because it offers flexibility and durability. Finally, apply multiple coats—typically two to three—making sure each coat dries fully before adding the next.
| Step | Action |
|---|---|
| 1. Wait for Dryness | Moisture test wood, 3-6 months |
| 2. Clean the Surface | Stiff brush, mild detergent |
| 3. Apply Primer | High-quality exterior latex primer |
| 4. Paint | Multiple coats of acrylic latex paint |
Should You Stain Instead of Paint Pressure Treated Wood?
Why might you choose to stain pressure treated wood instead of painting it? Staining allows the wood to breathe, which helps prevent moisture buildup. This moisture often causes paint to peel or bubble, so staining can be a better option.
Staining pressure treated wood lets it breathe, preventing moisture buildup that often causes paint to peel or bubble.
When you stain pressure treated wood, the stain penetrates deeply. It enhances the natural grain while offering UV protection and weather resistance. This means you’ll end up with lower maintenance compared to painting, which creates a barrier that can trap moisture.
Before you apply stain, you need to wait until the wood is fully dry, usually 3 to 6 months. This waiting period ensures proper absorption and color retention.
Semi-transparent or solid color stains give you plenty of aesthetic options without sacrificing durability.
Frequently Asked Questions
Can I Paint Treated Wood Indoors?
Yes, you can paint treated wood indoors as long as you keep the moisture content below 14%. This helps the paint stick properly and last longer.
Make sure to prepare the surface well before you start painting.
It’s a good idea to use primers that are made specifically for treated wood. Also, pick low-VOC paints to keep the indoor air quality safe and reduce any health concerns.
Give each coat enough time to dry before applying the next one. Choose paint finishes that work well indoors, and use careful application techniques.
Finally, think about your color choices—they should complement your space and give you a smooth, durable finish.
How Does Weather Affect Painting Treated Wood?
Weather can make painting treated wood feel like battling a wild beast! Moisture retention and temperature fluctuations drastically affect drying time and paint adhesion.
Too much UV exposure weakens finish durability, while wind carries dust that ruins surface preparation.
You’ve got to pick the right paint types and sealing techniques, considering seasonal considerations carefully.
Paint in stable, dry conditions to guarantee a smooth, long-lasting finish that stands up to nature’s chaos.
It’s all about timing and the right materials to keep your wood looking great.
Will Painting Treated Wood Affect Its Longevity?
Yes, painting treated wood can boost its longevity by creating a strong moisture barrier and enhancing weather resistance.
Proper surface preparation and using quality paint types designed for wood treatment improve paint adhesion and finish durability. The right paint also adds UV protection, guarding against sun damage.
Remember, longevity factors depend on regular maintenance tips like timely touch-ups.
Can I Use Oil-Based Paint on Treated Wood?
You can use oil-based paint on treated wood, but it’s not the best choice because it doesn’t stick well and lacks flexibility.
Make sure the treated wood is completely dry before you start painting. Using a high-quality exterior latex primer is really important for durability.
Primer is a must if you want the paint to last.
Oil-based paint does have some perks, like giving you a smooth surface and plenty of color options. However, it also has some downsides, including environmental concerns and more upkeep.
For the best results, follow proper application steps carefully.
Whenever you can, try to go with latex paint instead—it usually works better on treated wood.
How Often Should I Repaint Treated Wood Surfaces?
You’ll want to keep an eye on repainting frequency, aiming for every 3 to 5 years depending on weather conditions and wear.
Use exterior-grade paint and don’t skip primer usage. Surface preparation is key for paint adhesion.
Maintenance tips include regular inspections and timely touch-ups.
Choose your color and finish options wisely. Apply with proper techniques to extend durability.
This way, your treated wood stays vibrant and protected longer.
Conclusion
You might think painting pressure treated wood is as simple as slapping on some paint right after buying it. But you’d be rushing into a soggy mess.
Waiting until it’s dry, prepping it well, and choosing the right primer are the real secrets. So yes, you can paint it, but only when it’s ready. Otherwise, you’re just inviting peeling disappointment.
Follow the steps, and your wood will thank you with lasting beauty.