Can U Paint Over Stained Wood: What You Need To Know
Yes, you can paint over stained wood, but first identify whether the stain is oil- or water-based using a simple test. Properly clean and degloss the surface to promote primer adhesion. Use a high-quality bonding primer matched to your stain type to block bleed-through and guarantee paint sticks well.
Choose compatible paint—latex for water-based stains and oil-based for oil stains—for durable coverage. Follow these steps carefully, and you’ll achieve a smooth, lasting finish. There’s more to know for expert results, so take your time and do it right.
Identifying Stain Type Before Painting Over Stained Wood
How can you tell what type of stain is on your wood before painting over it? Identifying the stain type is essential to guarantee proper paint adhesion and avoid bleed-through.
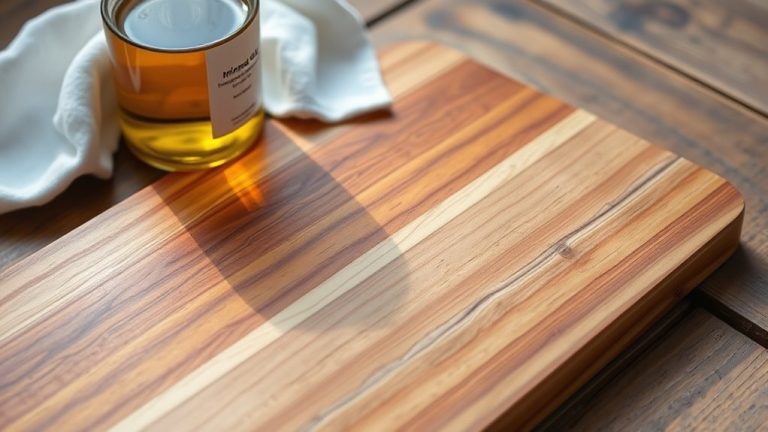
Start by performing the denatured alcohol test: apply alcohol to a white rag and rub the stained wood. If the rag remains clean, you’re dealing with an oil-based stain. If color transfers to the rag, it’s a water-based stain.
Use denatured alcohol on a rag; color transfer means water-based stain, no color means oil-based.
You can also examine the surface texture. Oil-based stains create a smooth finish, while water-based stains leave a rougher feel.
Knowing whether your stain is oil-based or water-based guides your primer and paint choices. Oil-based stains allow both oil-based and latex paint, whereas water-based stains require latex paint only.
This clarity saves you time and guarantees a durable, professional finish.
Why Proper Surface Preparation Beats Sanding
You’ll get better results if you clean and degloss stained wood thoroughly before painting, instead of just sanding.
Proper surface prep not only removes residue but also creates a nice, smooth base.
Plus, when you apply a bonding primer, it seals the wood and stops any stain from bleeding through.
This way, your paint sticks better and the finish lasts longer with a polished look.
Cleaning Over Sanding
Three key steps, cleaning, deglossing, and priming, can often replace sanding when prepping stained wood for paint. This can save you time and effort. Thorough cleaning removes dirt, grease, and residues that are essential for a durable finish.
Using a stain-blocking primer guarantees that the paint adheres properly and prevents bleed-through. This approach also preserves wood integrity, especially on older surfaces.
| Step | Purpose | Recommended Product |
|---|---|---|
| Cleaning | Remove contaminants | TSP or Simple Green |
| Deglossing | Dull glossy surfaces | Liquid deglosser |
| Priming | Promote adhesion, block stains | Stain-blocking primer |
Follow these painting tips to achieve a smooth, long-lasting finish without sanding. This way, you protect your wood and simplify the process.
Deglossing Benefits Explained
Although sanding has long been the traditional method for preparing stained wood, deglossing offers a more efficient alternative that enhances primer adhesion by removing the glossy surface without damaging the wood.
Deglossing creates a slightly rough texture essential for paint to grip firmly, ensuring a durable finish.
Using chemical deglossers speeds up preparation, reduces dust, and makes cleanup much easier compared to sanding.
When you apply a chemical deglosser, it gently dissolves the shiny layer, preserving the wood grain’s integrity while optimizing primer adhesion.
Just remember to use chemical deglossers in a well-ventilated area and wear protective gear to stay safe.
Overall, deglossing provides a quicker, cleaner, and less invasive way to prep stained wood for painting.
It really makes the whole process a lot smoother.
Primer Importance Highlighted
After preparing stained wood with a deglosser, applying the right primer becomes the key to a lasting paint job. Primer importance lies in enhancing paint adhesion and preventing stain bleed-through. A stain-blocking primer seals dark stains, ensuring a uniform finish and vibrant color.
Proper surface preparation with a bonding primer often beats sanding by saving time and delivering durability. It’s all about getting that smooth, long-lasting result without extra hassle.
| Primer Type | Purpose | Benefit |
|---|---|---|
| Stain-blocking | Prevents bleed-through | Uniform color, no stains |
| Bonding | Enhances adhesion | Reduces peeling and chipping |
| Oil-based | Compatible with oil stains | Ideal surface compatibility |
| Water-based | Compatible with water stains | Smooth finish |
| High-quality | General use | Faster, professional results |
Use primers tailored to your stain type for best results. Choosing the right one really makes all the difference!
Choosing the Right Primer for Stained Wood
You’ll want the right primer to make sure your paint sticks well and stops any stains from bleeding through on wood surfaces.
Usually, bonding primers do the trick for most stains. But if you’re dealing with tough or dark stains, an alcohol-based BIN primer is your best bet because it blocks stains better.
Just be sure to apply the primer evenly, and give it plenty of time to dry completely before you start painting.
That way, you’ll get a smooth, durable finish every time.
Primer Types Explained
Choosing the right primer is essential when painting over stained wood to guarantee a smooth, durable finish. You’ll want to understand the differences between stain-blocking primers and how they interact with your paint choice. Here’s what to evaluate:
- Stain-blocking primers prevent bleed-through from dark or oil-based stains, ensuring an even topcoat.
- Water-based vs. oil-based primers matter; water-based suits water-based stains, while oil-based primers seal oil stains and offer paint flexibility.
- Compatibility with paints is critical. Match your primer to your paint type, whether latex or oil-based, for proper adhesion and durability.
Selecting the right primer and applying it evenly with proper drying prepares your stained wood perfectly for painting.
It’s really about setting yourself up for a flawless finish that lasts.
Stain Blocking Importance
Selecting the right primer sets the stage, but understanding why stain-blocking primers matter can make a significant difference when painting over stained wood. A stain-blocking primer is vital to stop stain bleed, especially from darker stains, guaranteeing your paint job looks clean and flawless.
It not only prevents unsightly discoloration but also promotes strong paint adhesion by creating an even surface for the topcoat.
When covering oil-based stains, you can use either oil-based or latex paint, but water-based stains require latex paint paired with an appropriate primer. For tough bleed-through issues, an alcohol-based BIN primer works exceptionally well.
Application Tips
Although staining can add rich character to wood, painting over it demands careful primer selection to guarantee lasting adhesion and prevent unsightly bleed-through. Choosing the right bonding primer is essential; it must be compatible with both the stain and the paint type you plan to use.
For oil-based stains, you can use either oil-based or latex paint, but water-based stains require latex paint and a matching primer.
Here are some tips to keep in mind:
Use an alcohol-based BIN primer for tough bleed-through issues, as it effectively blocks stains.
Make sure the primer fully covers the stained surface and dries completely before painting.
It’s also a good idea to test the primer on a small area to confirm adhesion and stain blocking.
Following these steps will help your paint job stay flawless and durable over stained wood.
Best Paint Types for Durable Coverage on Stained Wood
When you want a durable finish on stained wood, the type of paint you use plays an essential role in the longevity and appearance of your project.
Latex paint is a top choice because it offers flexibility, easy cleanup, and excellent adhesion, especially when paired with a quality bonding primer.
Oil-based paint also delivers a smooth, durable finish, ideal for high-traffic areas. It does require good ventilation and longer drying times, though.
Your primer selection is equally important. A high-quality bonding primer like Zinsser BIN or Valspar Bonding Primer prevents stain bleed-through and enhances paint adhesion.
Painting Stained Wood Without Sanding: Step-by-Step Guide
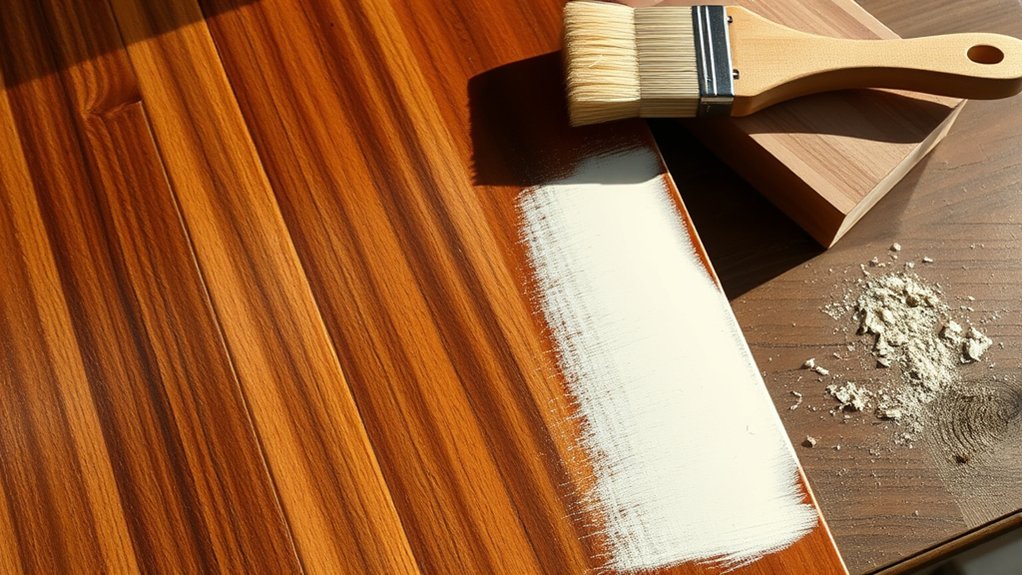
If you want to paint stained wood without sanding, start by thoroughly cleaning and degreasing the surface. This step guarantees the bonding primer will stick properly.
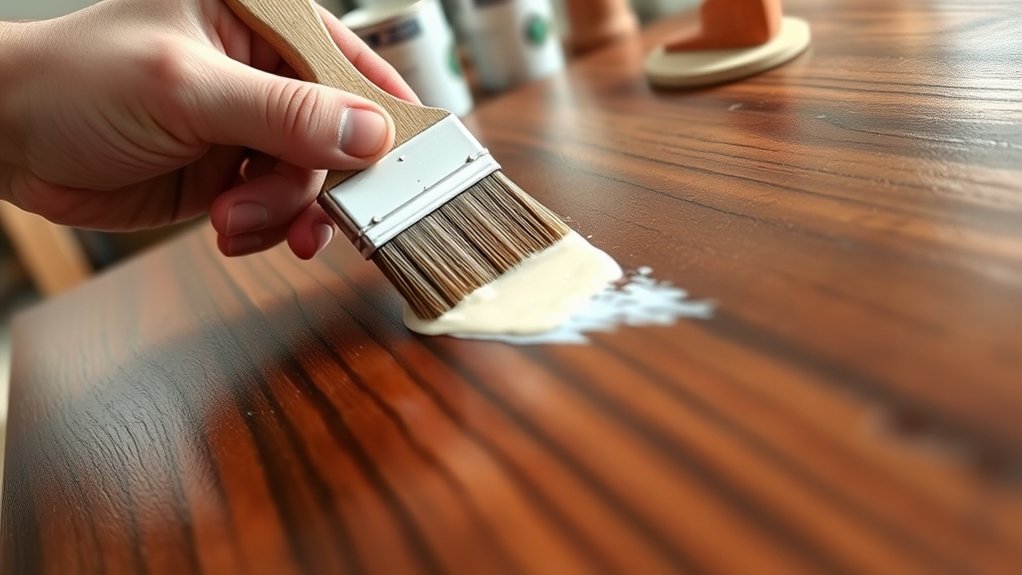
Next, apply a high-quality bonding primer designed for slick surfaces. It’s really important to do this to ensure strong adhesion and prevent peeling.
Use a high-quality bonding primer made for slick surfaces to ensure strong adhesion and avoid peeling.
After the primer dries, go ahead and apply 2-3 thin coats of your chosen paint. Be sure to let each coat dry completely before adding the next one. Using quality brushes or rollers will help you get a smooth, professional finish.
Finally, protect your work with a clear coat. This will enhance durability and guard against wear.
Key steps include:
- Cleaning and degreasing for primer effectiveness
- Applying bonding primer for adhesion
- Using multiple thin paint coats followed by a clear coat
This method lets you paint stained wood flawlessly without sanding. It’s easier than you might think!
Common Challenges and How to Avoid Paint Bleed-Through
After preparing stained wood properly and applying primer and paint, you might still encounter paint bleed-through. This is a common issue that can ruin your finish. To avoid this, always use a stain-blocking primer compatible with your stain type.
This is especially important when dealing with dark stains that tend to bleed through lighter paint colors. Before priming, degloss or lightly sand the surface to improve adhesion and minimize bleed-through risks.
Equally important is allowing adequate drying time for the primer. Rushing this step can cause the stain to seep through your paint layers.
Keep a close eye on your work during the process. If you spot any bleed-through, address it promptly by reapplying stain-blocking primer. Make sure it dries fully before painting again. This approach guarantees a clean, durable finish.
Sealing and Maintaining Painted Stained Wood Surfaces
Although painting over stained wood provides a fresh, updated look, sealing and maintaining that painted surface is essential to guarantee long-lasting protection and appearance.
Applying a clear topcoat creates a durable protective layer that shields the paint from scratches and everyday wear.
A clear topcoat forms a strong barrier, protecting painted wood from scratches and daily wear.
Regular maintenance keeps the surface vibrant and intact. To properly care for your painted wood, remember to clean gently with mild soap and water.
Avoid abrasive cleaners that can damage the finish.
Also, keep an eye out for chips or peeling and address these issues promptly to prevent further damage.
It’s a good idea to reapply a clear topcoat every few years to renew the protective layer and extend the paint’s lifespan.
Taking these simple steps will help your painted wood look great for years to come.
Frequently Asked Questions
Can I Paint Over Stained Wood Furniture Indoors Without Proper Ventilation?
You shouldn’t paint over stained wood furniture indoors without proper ventilation. Paint fumes release harmful chemicals that can quickly build up, risking your health. So, it’s really important to keep the air flowing when you’re working.
Try opening windows and using fans to guarantee good airflow. If you don’t have much ventilation, go for low-VOC or water-based paints instead. Those are safer for indoor use.
Also, always wear a respirator made for paint fumes to protect yourself.
And once you’re done, keep the area well-ventilated while the paint is drying. It helps keep things safe and comfortable.
How Long Should I Wait After Staining Before Painting Over the Wood?
Remember, patience is a virtue, especially with stain curing time. You should wait at least 48 hours after applying a mineral-based stain before painting.
Though honestly, waiting a full week guarantees better adhesion.
For water-based stains, a few hours usually do the trick. Make sure to follow proper wood preparation steps like sanding and cleaning before you start painting.
Always test a small area first to confirm the stain’s fully cured. This way, your paint job will last longer and look flawless.
Is It Necessary to Remove Old Paint Before Painting Over Stained Wood?
You don’t always need to remove old paint before painting over stained wood, but proper prep techniques are essential.
If the existing paint is peeling or damaged, strip or sand it for better paint adhesion.
For intact finishes, clean and degloss the surface thoroughly.
Consider the stain types beneath, as some may bleed through.
Using a bonding primer helps seal the surface and guarantees your new paint sticks well and lasts longer.
Can I Use Spray Paint on Stained Wood Surfaces?
Yes, you can use spray paint on stained wood surfaces, but wood preparation is essential.
Start by cleaning and sanding the wood to promote color adhesion. Choose spray paint types specifically made for wood to guarantee durability and even coverage.
Next, apply a bonding primer before spraying to prevent bleed-through and enhance adhesion.
Use thin, even coats, allowing drying time between layers.
Finally, finish with a clear sealant to protect your work and extend its life.
Taking these steps will help your paint job look great and last longer.
Will Painting Over Stained Wood Affect Its Natural Texture and Grain?
You might be surprised. Painting over stained wood will usually mask its natural texture and grain.
However, with proper wood preparation and the right staining techniques, you can improve paint adhesion and retain some depth.
Applying multiple thin coats of high-quality paint over a bonding primer lets subtle grain details peek through.
Conclusion
Painting over stained wood is like dressing a seasoned traveler for a new journey. You have to understand their history first, prepare them gently, and choose the right armor.
Skip the rough sanding and opt for a primer that seals secrets beneath the surface. With careful steps, you’ll cloak the wood in vibrant colors that stand strong against time.
Treat it well, and your painted wood will tell a fresh story. It will last through every chapter.